Adding and configuring proxies
The following methods for adding proxies are available in Linken Sphere
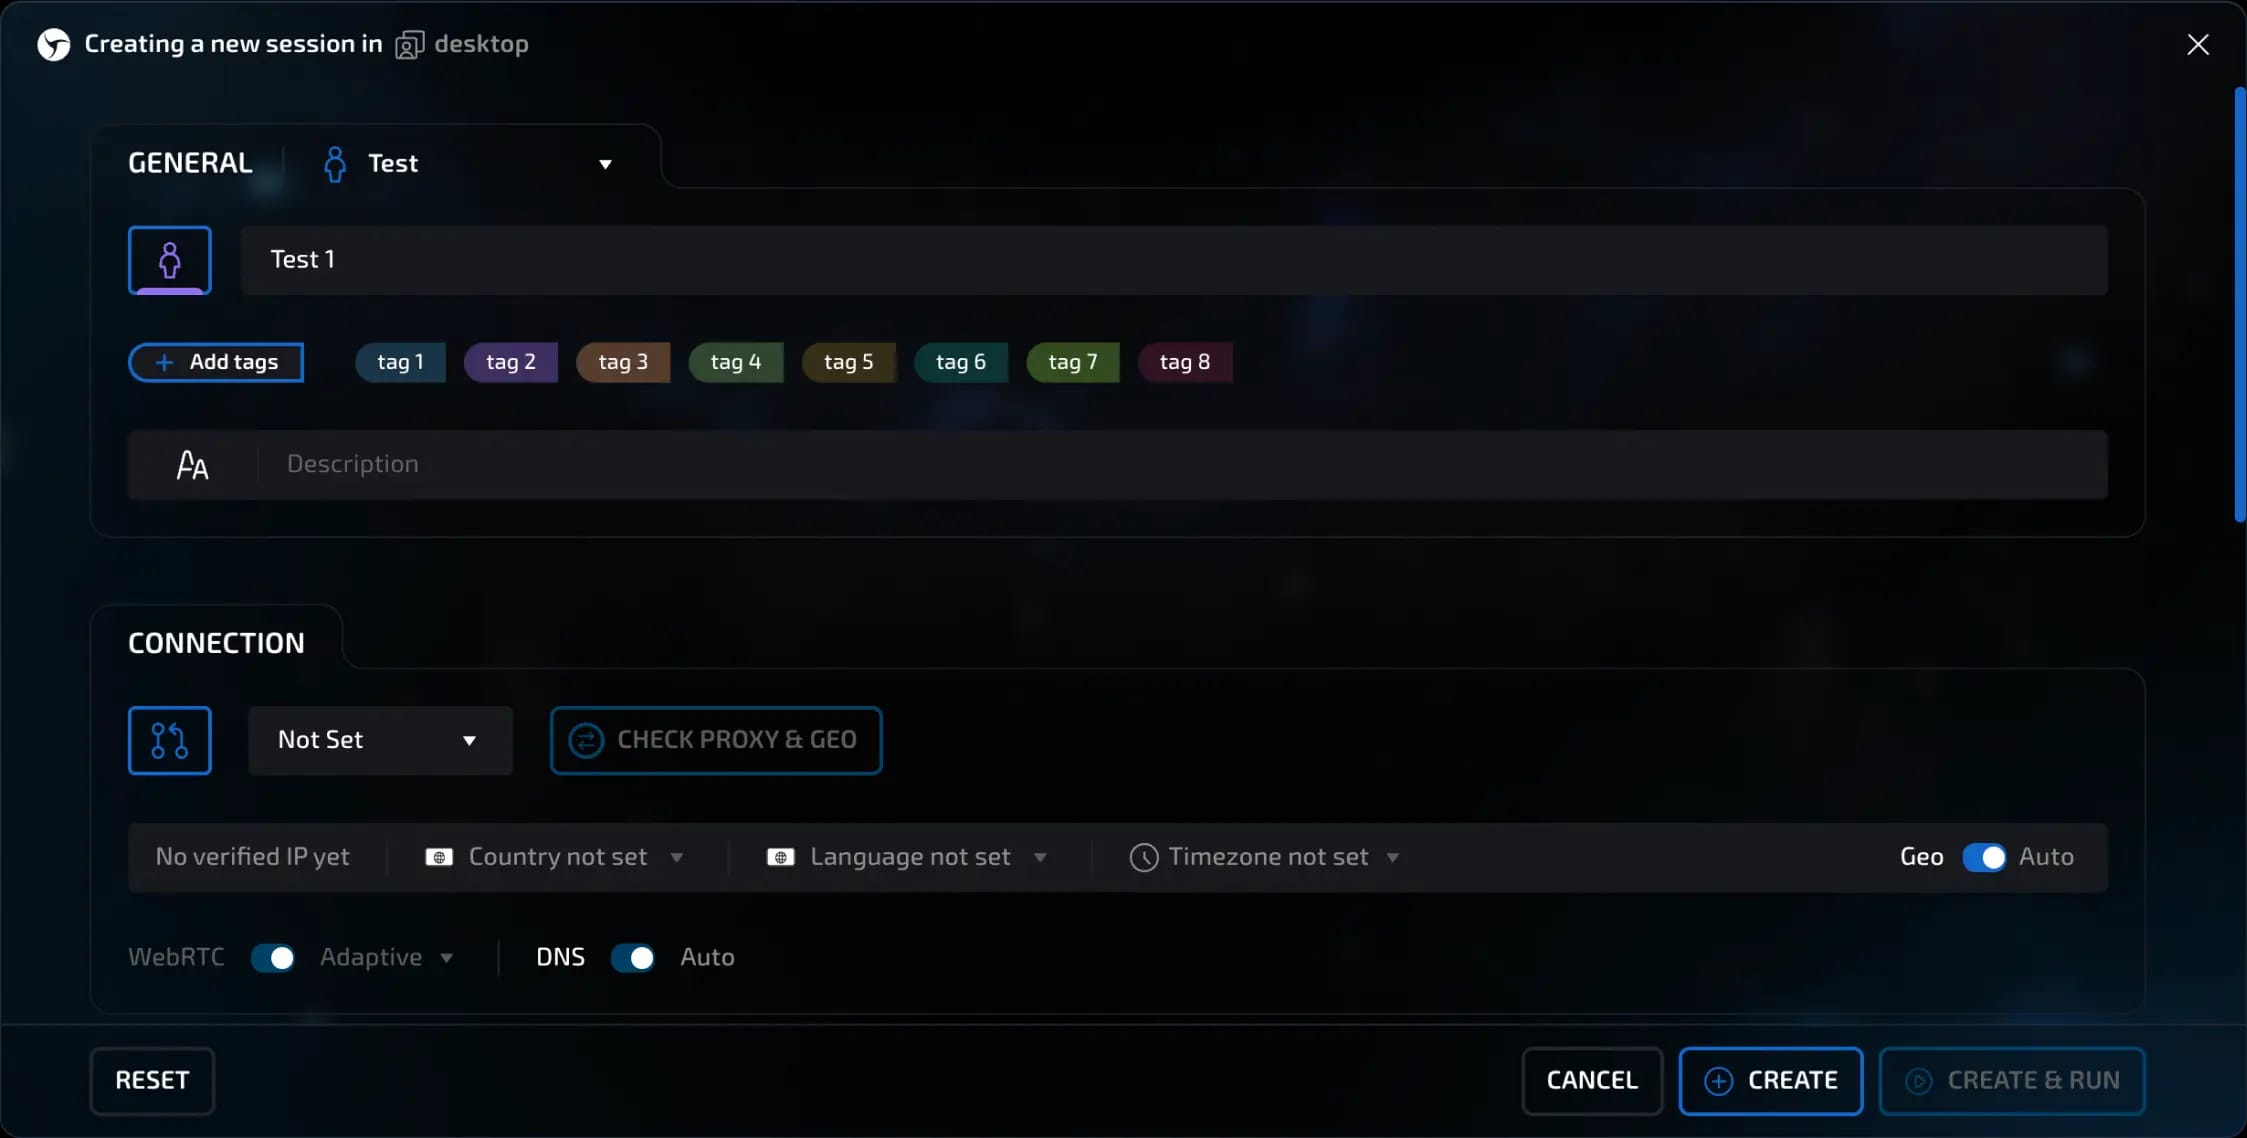
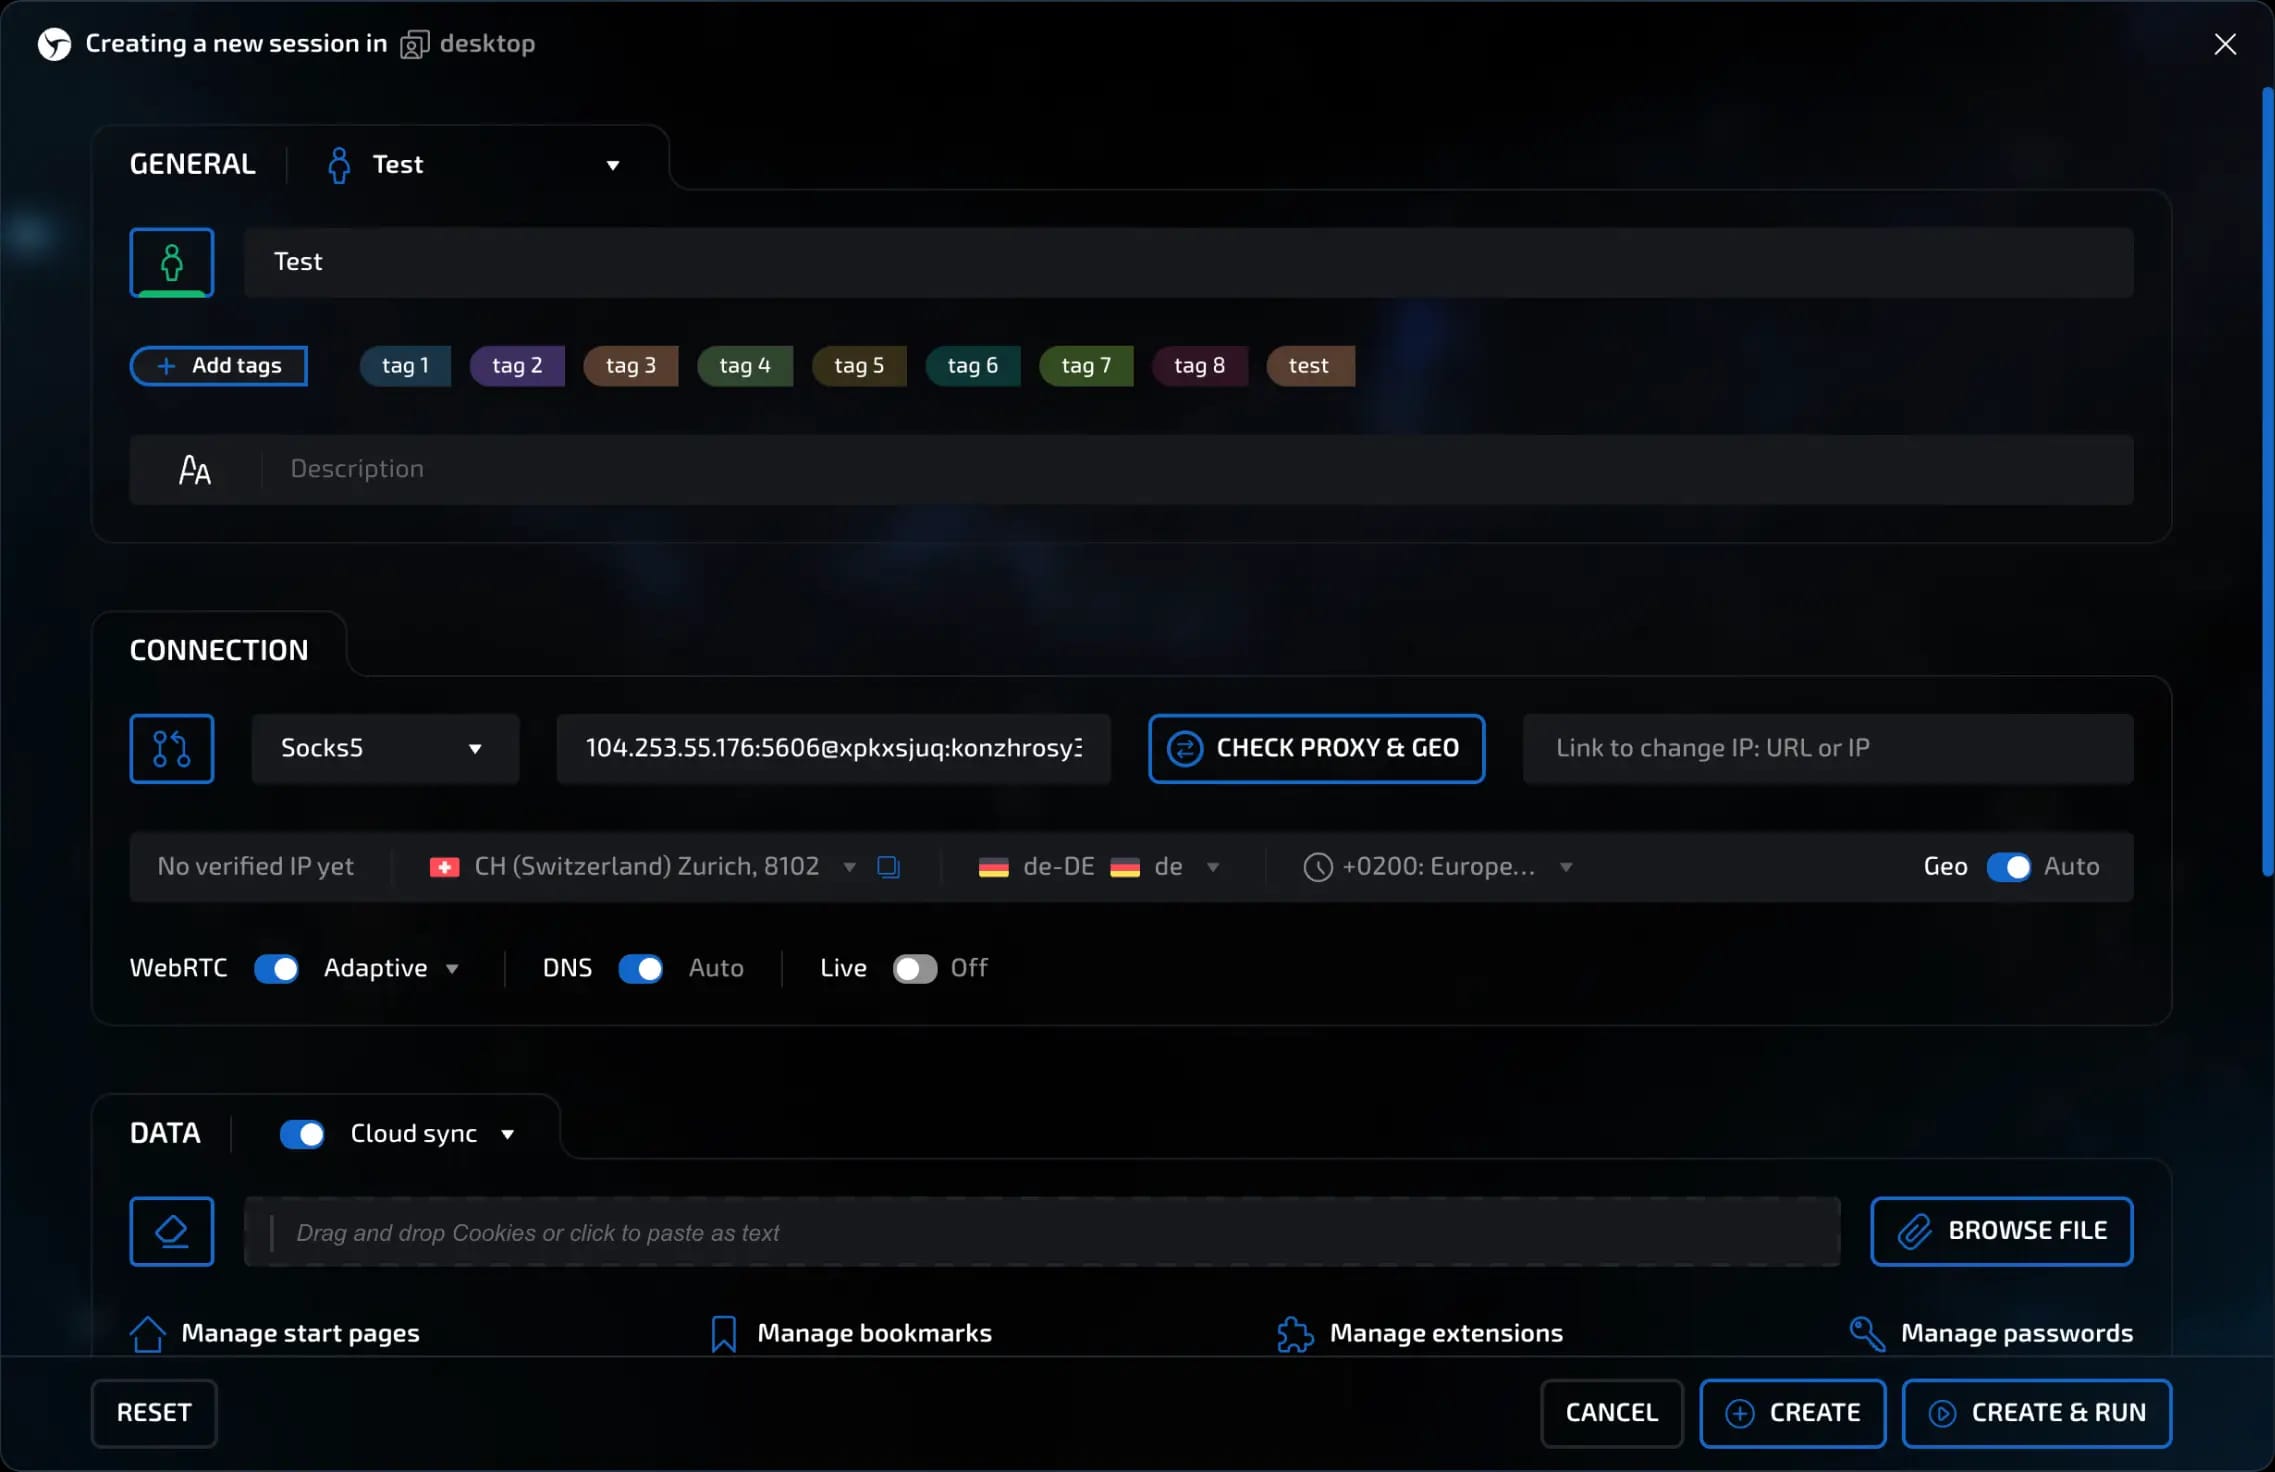
1. When creating a new session
In the "New session" window, open the "Connection" block. Specify the proxy type (HTTP / HTTPS, SOCKS5, SSH, or DIRECT) and enter the host, port, login, and password. You can import multiple lines at once using "Quick paste".
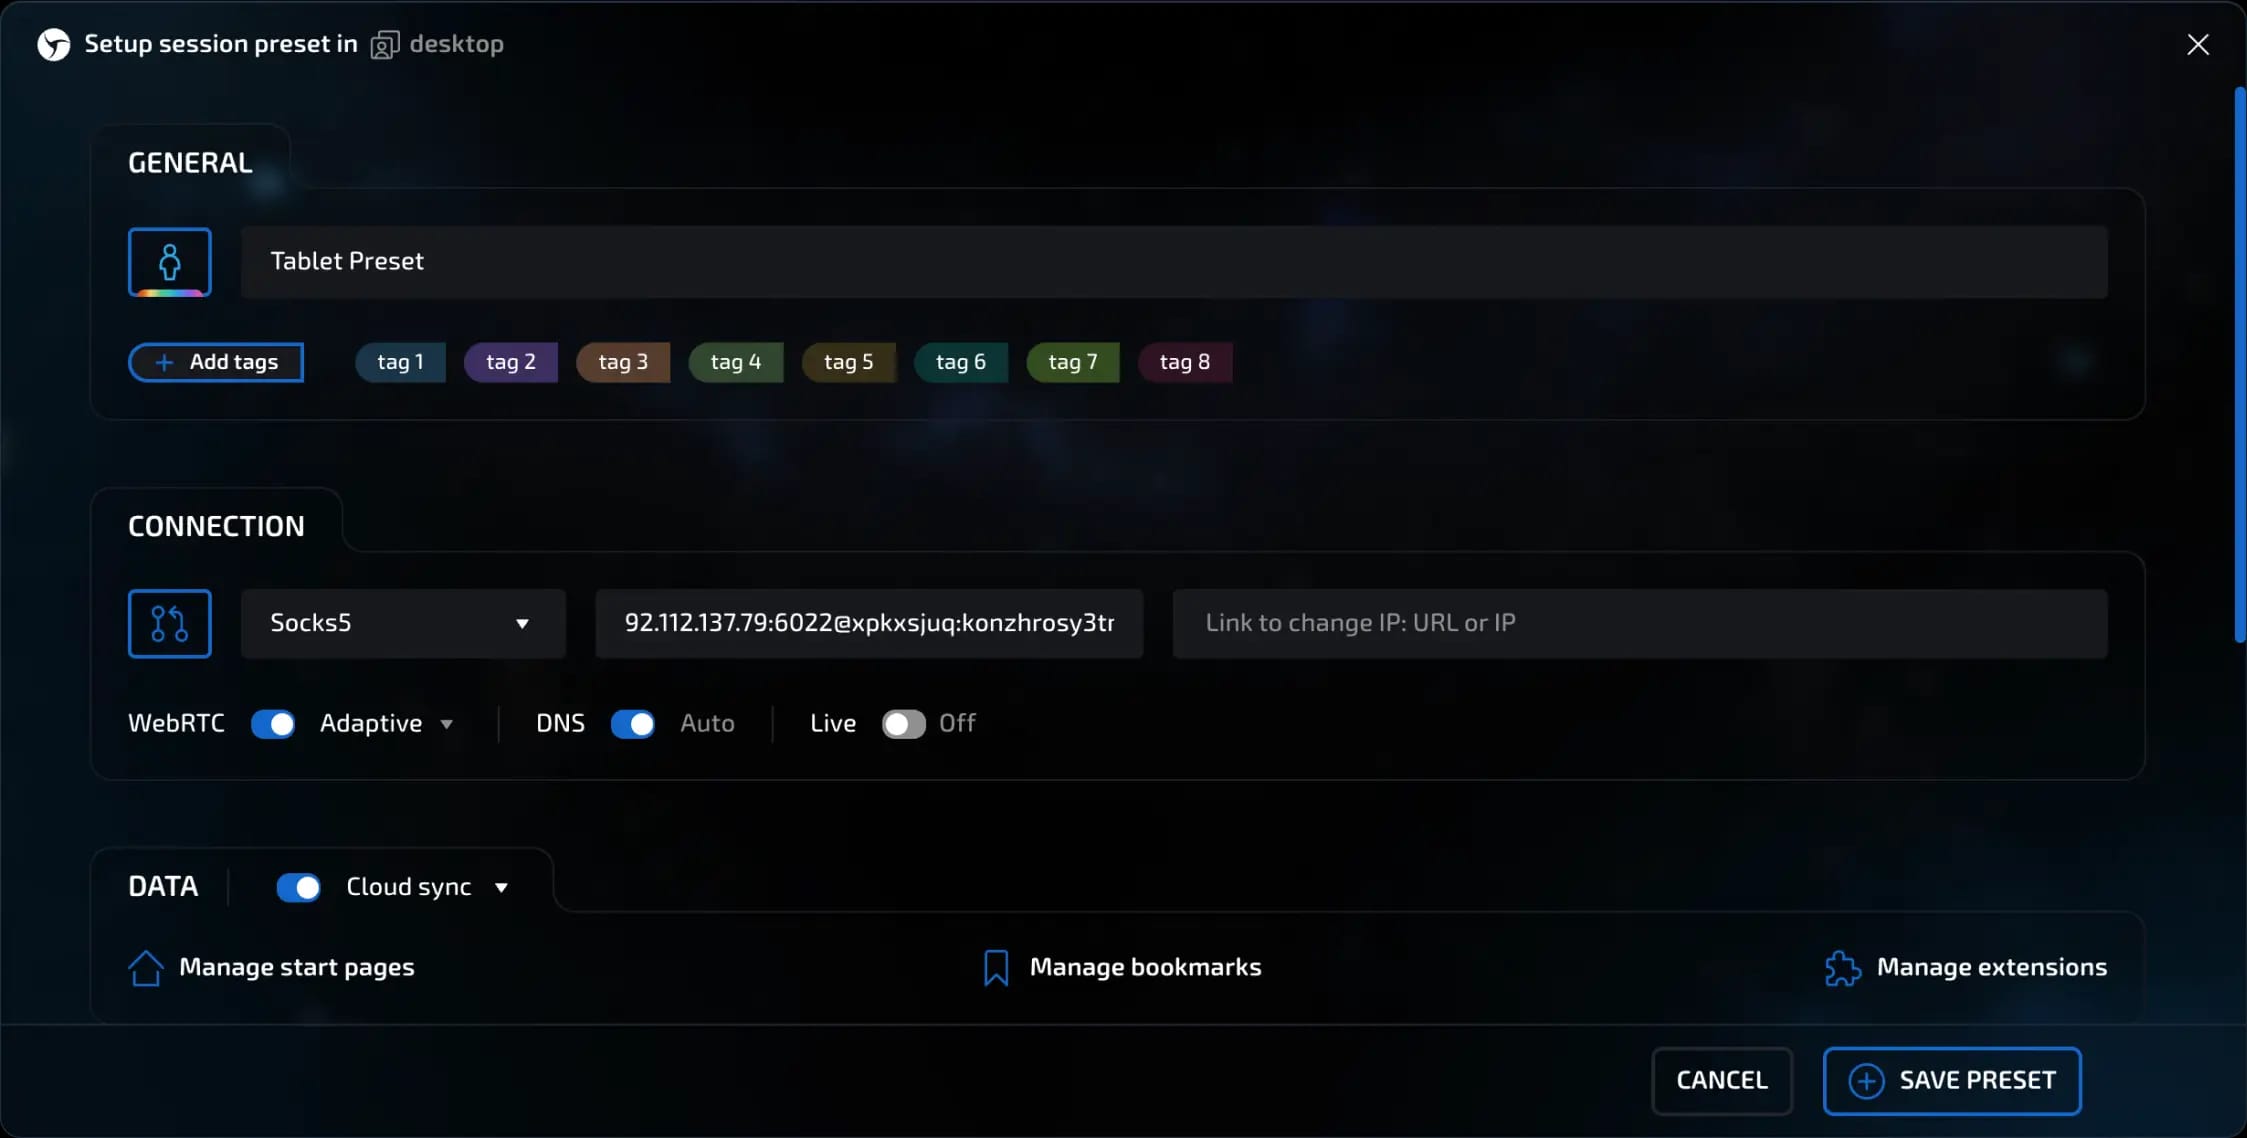
2. When creating or editing a preset
In the "Presets" menu, select "Create preset" or open an existing one. In the "Connection" block, set the desired proxy parameters. All sessions created based on this preset will inherit the specified proxy.

3. Quick proxy insertion in the session manager
In the session manager, you can link or replace a proxy in three ways:
Click in the "Proxy" column of the desired row and manually enter or paste a new line in the host:port:login:password format.

In the "Actions" column (smart shortcuts), click the "two connected dots and an arrow" icon - the "Quick paste" window will open, where you can paste multiple proxy lines at once, one per line.
Click the three dots icon to the right of the session, select "Set proxy" and add the data in the window that appears.
invisible text for space
Sphere will automatically determine the connection type, check the proxy, and link it to the selected sessions.

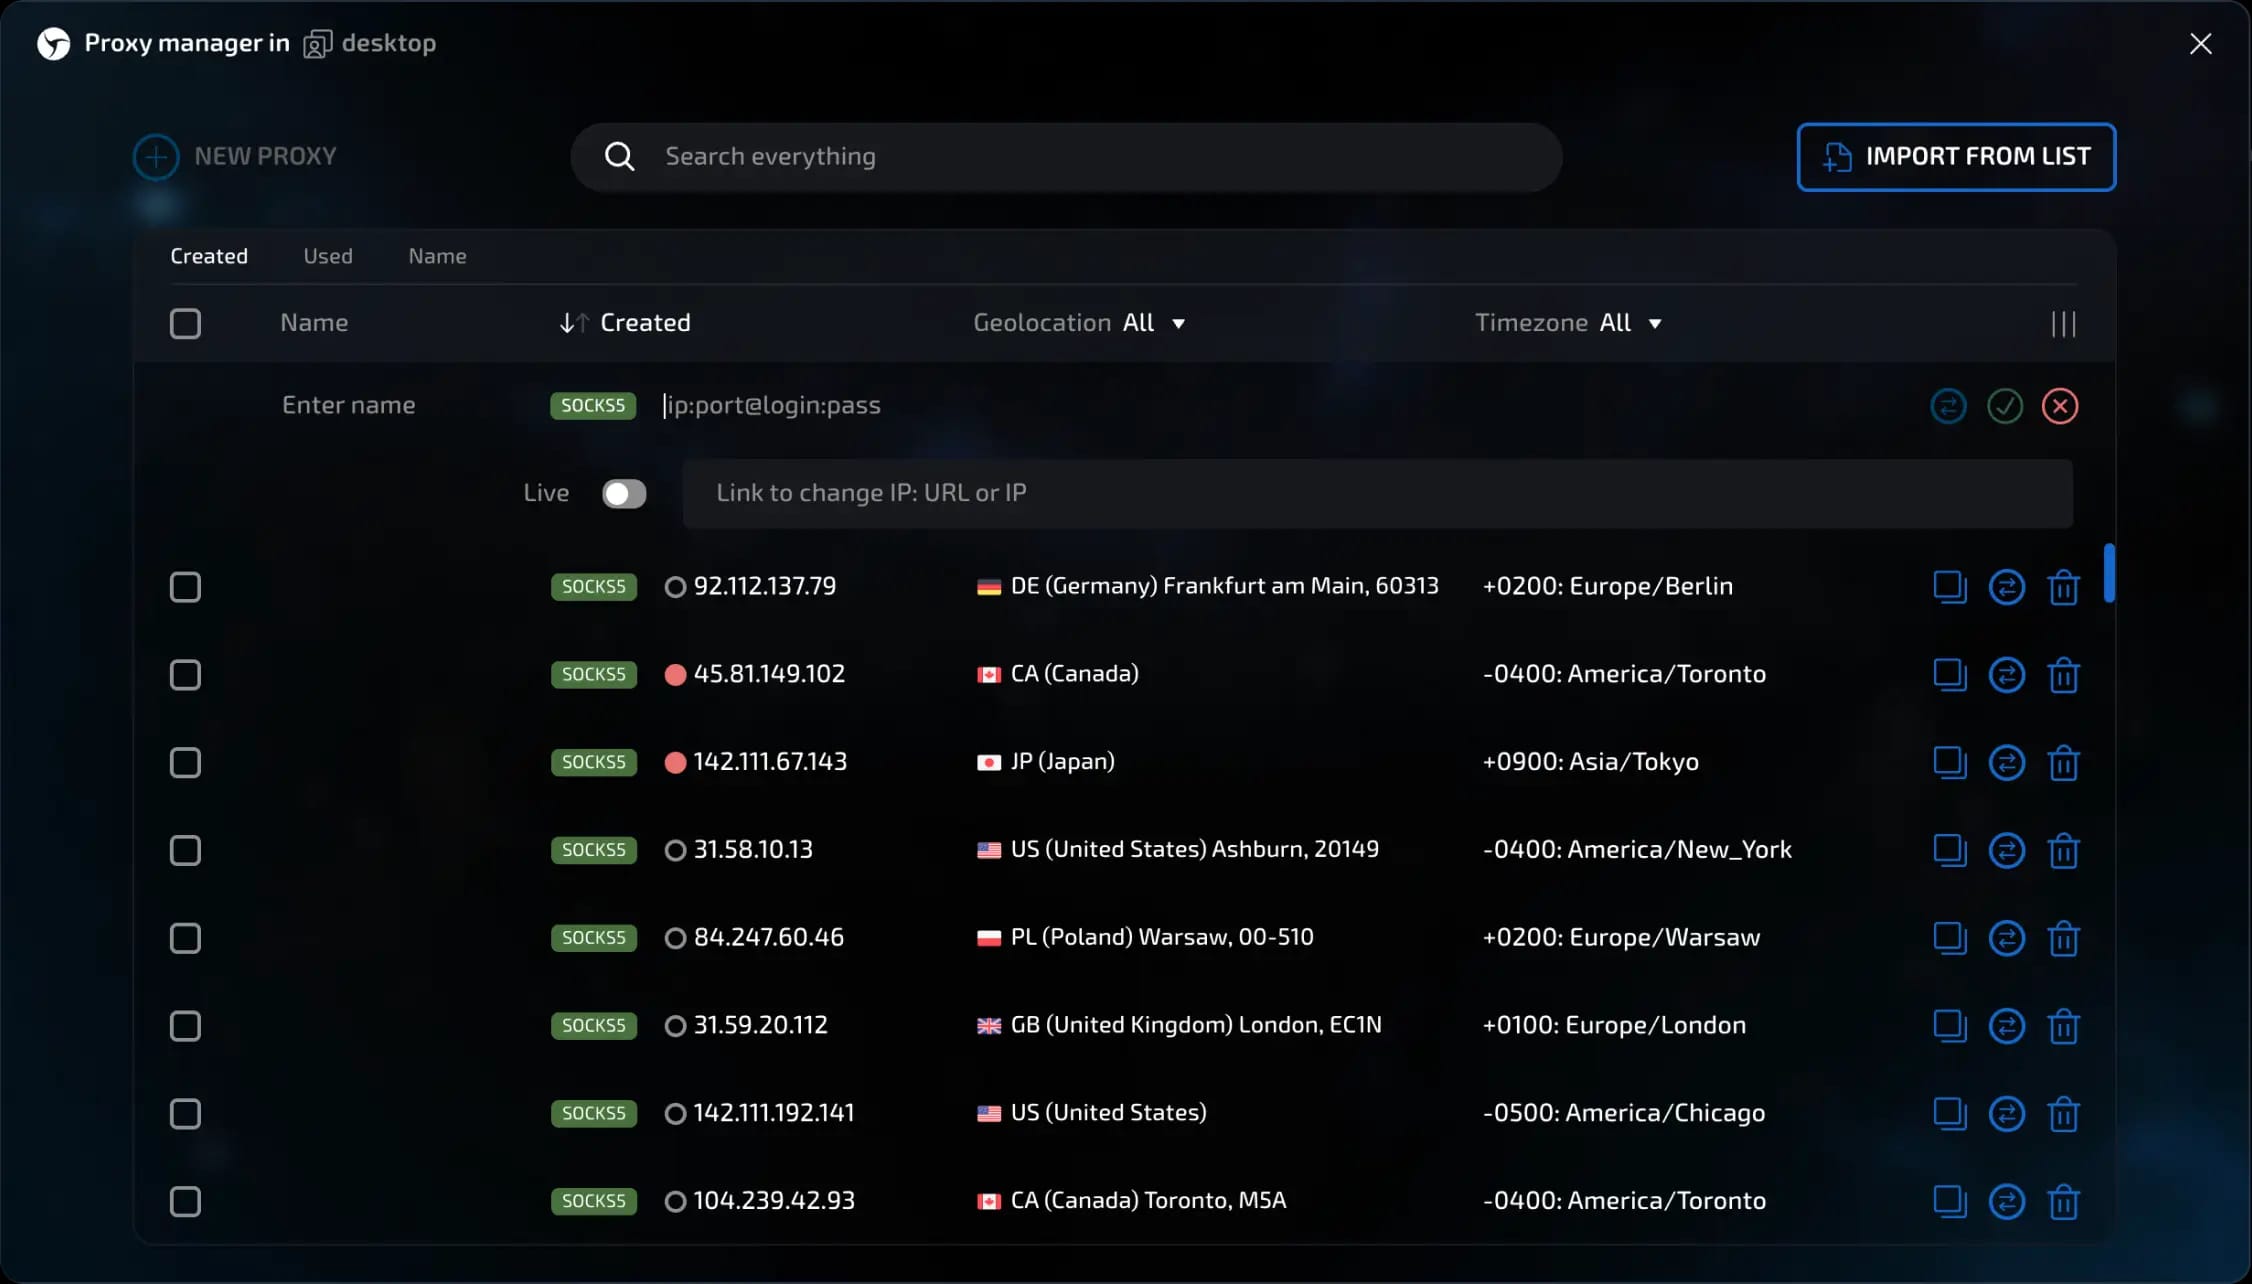
4. Via Proxy Manager
Opens when you click the Proxy icon in the upper right corner of the toolbar. Here you can import a list or a .txt / .csv file, test the speed and geolocation, and then bulk apply the selected proxies to sessions or desktops.
Case
Let's consider adding a proxy using the Proxy Manager.
Proxy Manager is a built-in tool for managing proxy servers in Linken Sphere. It helps you add, check, edit, and use proxies when creating sessions.
Procedure:
1. Opening Proxy Manager
Click the Proxy icon in the upper right sidebar menu.

A window will open where you can add and configure proxies.
2. Adding a single proxy manually
Click the "Add" button.

Set a name (e.g., Proxy 1).
Specify the proxy data:
IP address
Port
Login and password (if any)
After entering the data, the proxy check starts automatically.
The current IP is retrieved
Geolocation is determined
If you use a dynamic proxy, activate "Live mode" and add a link to change the IP.
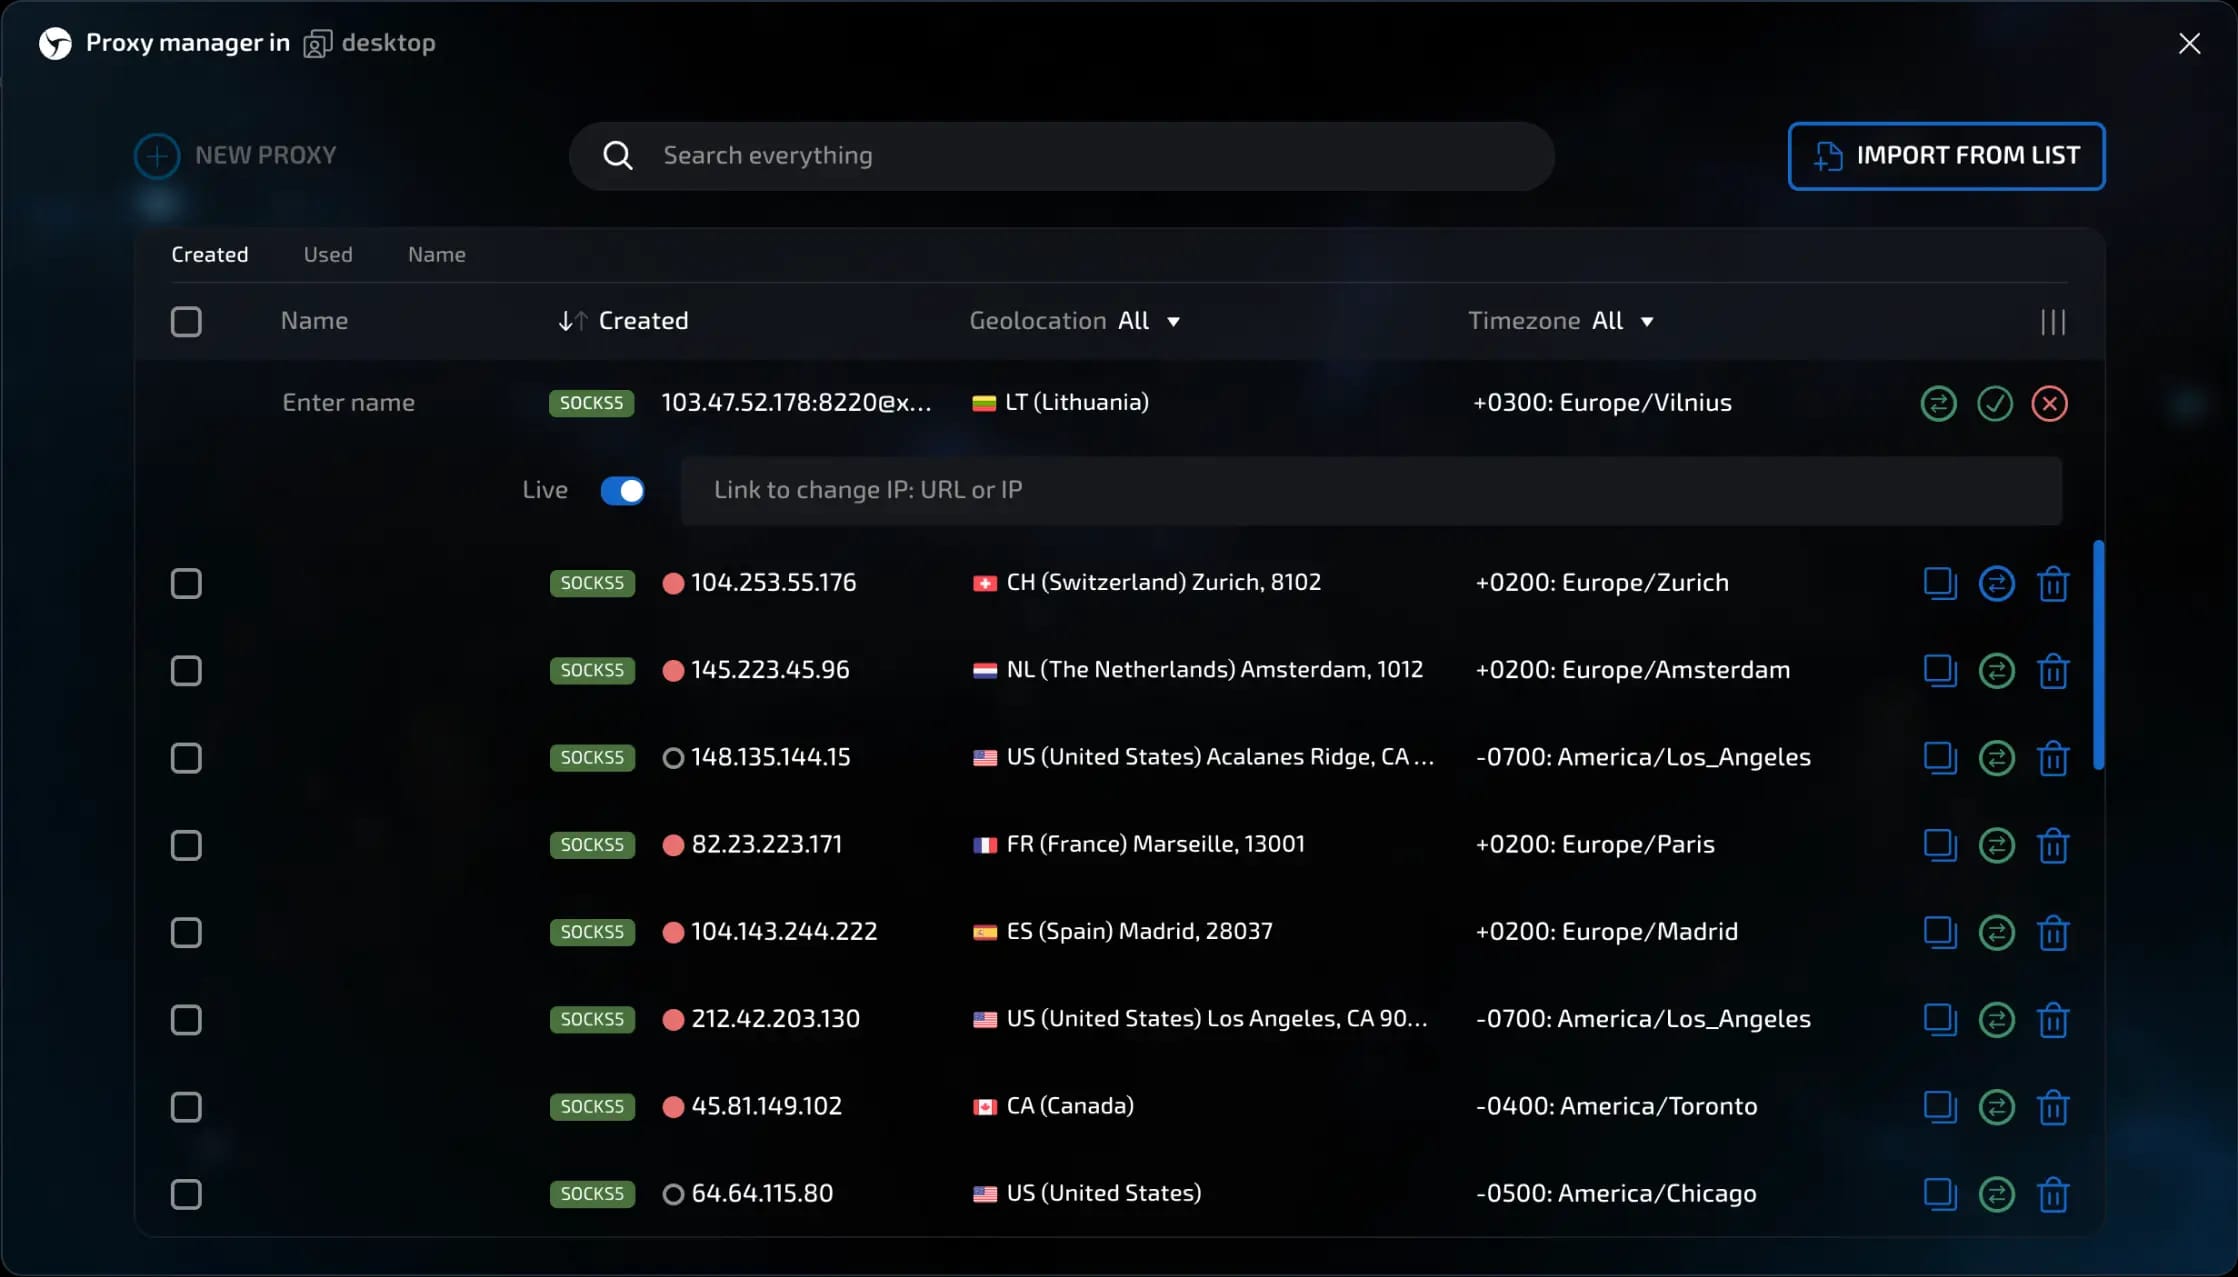
3. Working with already added proxies
You can:
Re-check proxies
Save changes
Delete outdated or non-working proxies
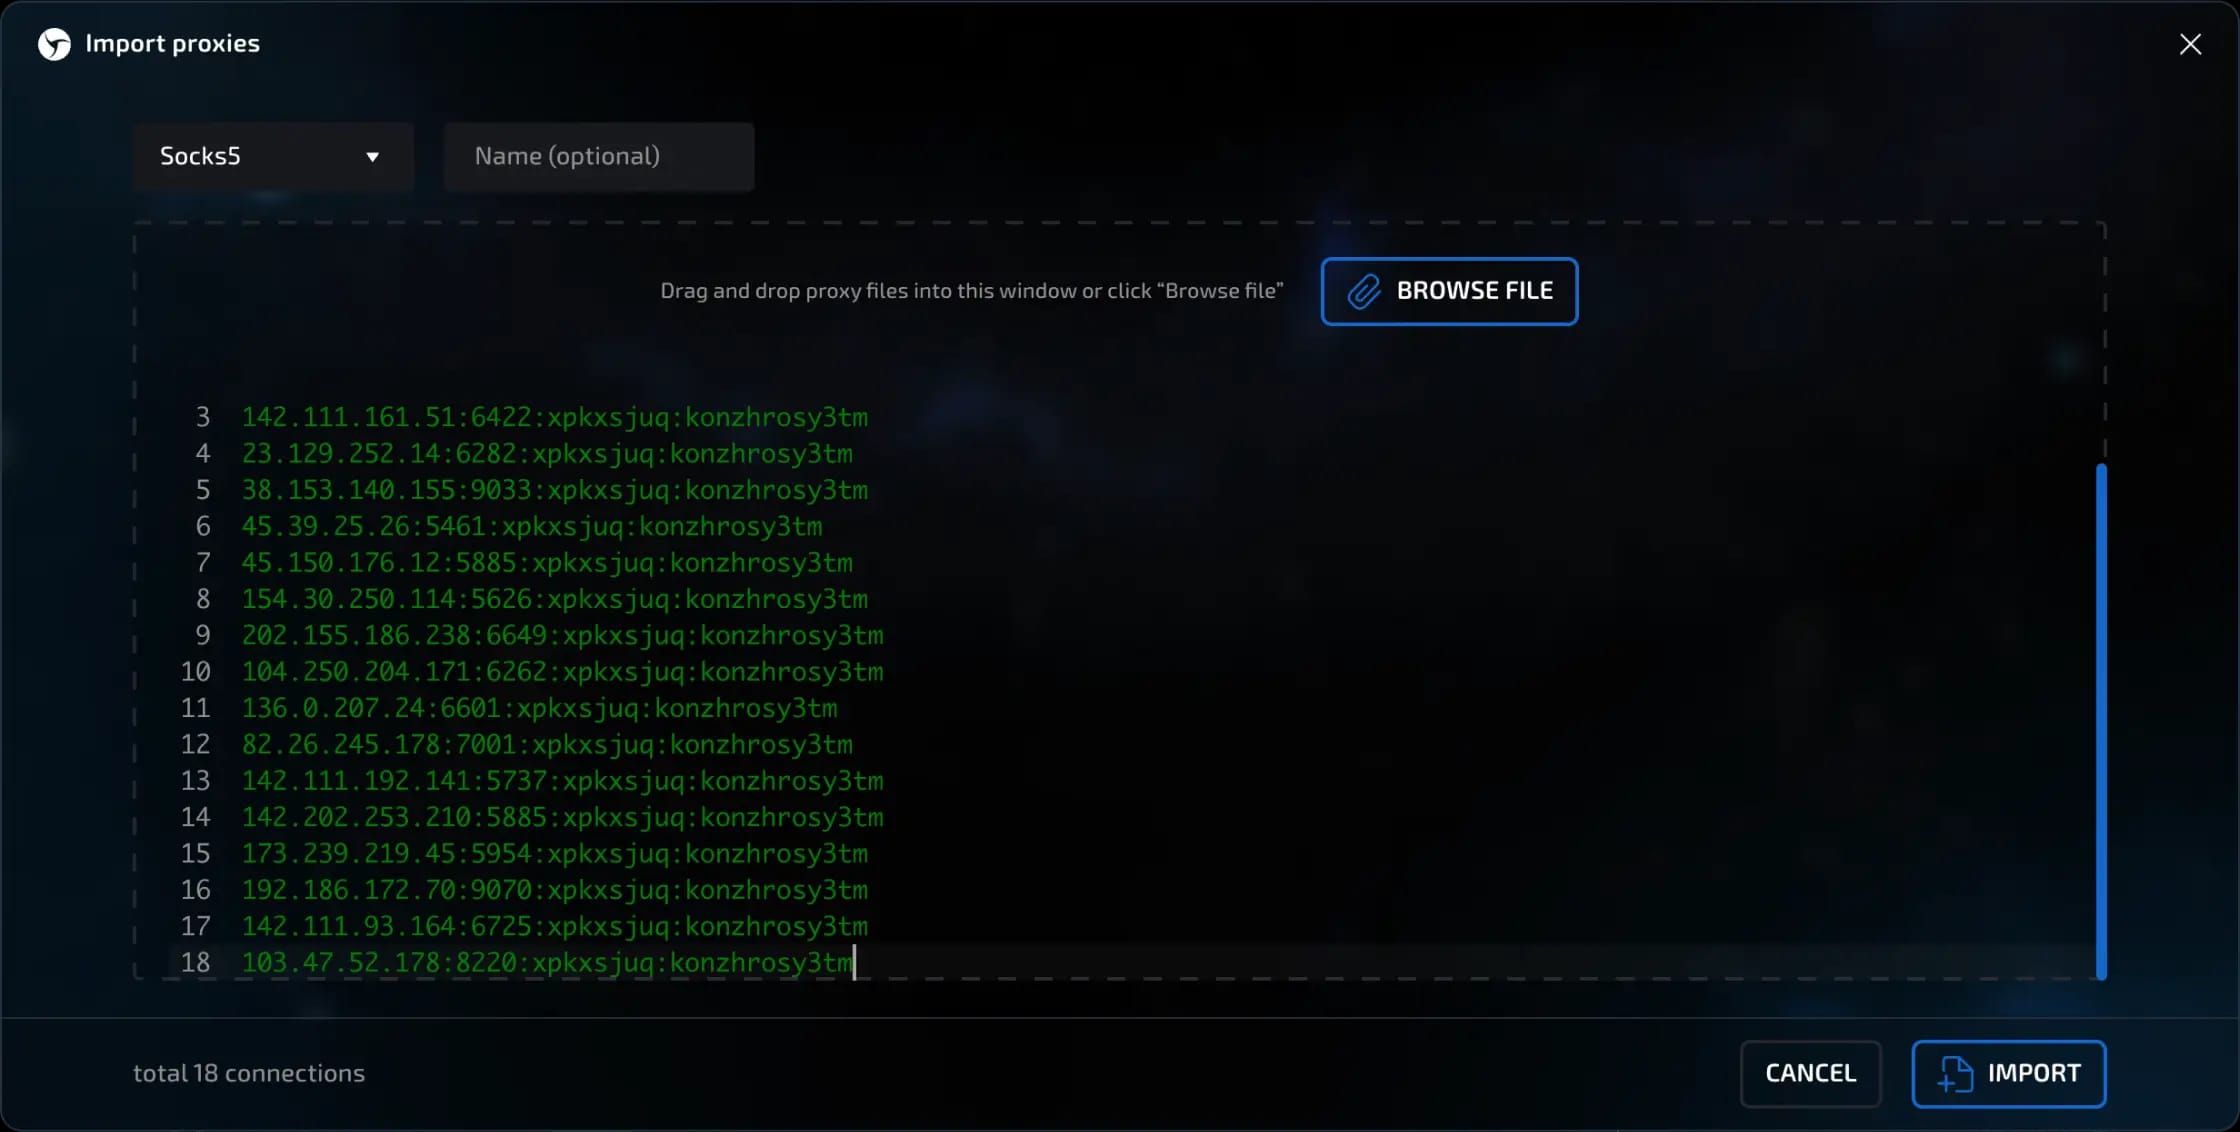
4. Importing a proxy list
Click the "Import from list" button.
In the window that opens:
Select the protocol (e.g., SOCKS5)
Specify a common name for the group (e.g., by country: US)
Paste the proxy list in a free format (flexible input format)
All proxies are automatically checked (IP, country, zip code)
Bulk actions available:
Check
Delete
Export to file
Remove duplicates and non-working proxies
Cloning between desktops
5. Using a proxy when creating a single session
Click "Create session".
Set a name (e.g., USA Proxy Test).
In the "Connection" block, open Proxy Manager.
Select the desired proxy and click "Set".
The proxy data will be substituted automatically
Click "Create".
The session passes the connection check and is created.
In the desktop list, you can see that the session is linked to the desired proxy
The proxy name is displayed in the session
6. Bulk session creation using Proxy Manager
Delete the previous test session (if necessary).
Create a preset:
Set a name (e.g., USA Proxy)
Open Proxy List - all added proxies are displayed
Check the desired proxies (already used ones are marked in red)
Click "Set"
Connections will be pulled automatically (e.g., 10 pieces)
Other parameters can be left as default
Click "Create" - the preset will be saved
Go to the bulk session creation window
Select the created preset, specify the number of sessions, and click "Create"
Wait for completion:
You will receive notifications that the Proxy Manager is empty and sessions are created
Each session will indicate the proxy name and a mark that it was taken from the Proxy Manager
invisible text for space
Now you know how to:
Add and configure proxies
Work with single and bulk sessions
Simplify routine tasks using presets and imports

Useful details
Bulk import accepts both the classic host:port:login:password format and JSON configurations for Shadowsocks.
Previous page
Next page