Creating and launching a session
Linken Sphere offers two modes for creating a session:
Normal creation. Opens a wizard with five settings blocks and provides full control over the configuration.
Quick creation. Instantly creates and launches a session based on the selected preset without going to the wizard.
Normal session creation: step-by-step instructions
Step 1. Click the "New Session" button on the main page. A window with five logical blocks will open.

Step 2. Fill in the fields in each block from top to bottom. Changes can be made until the window is closed.
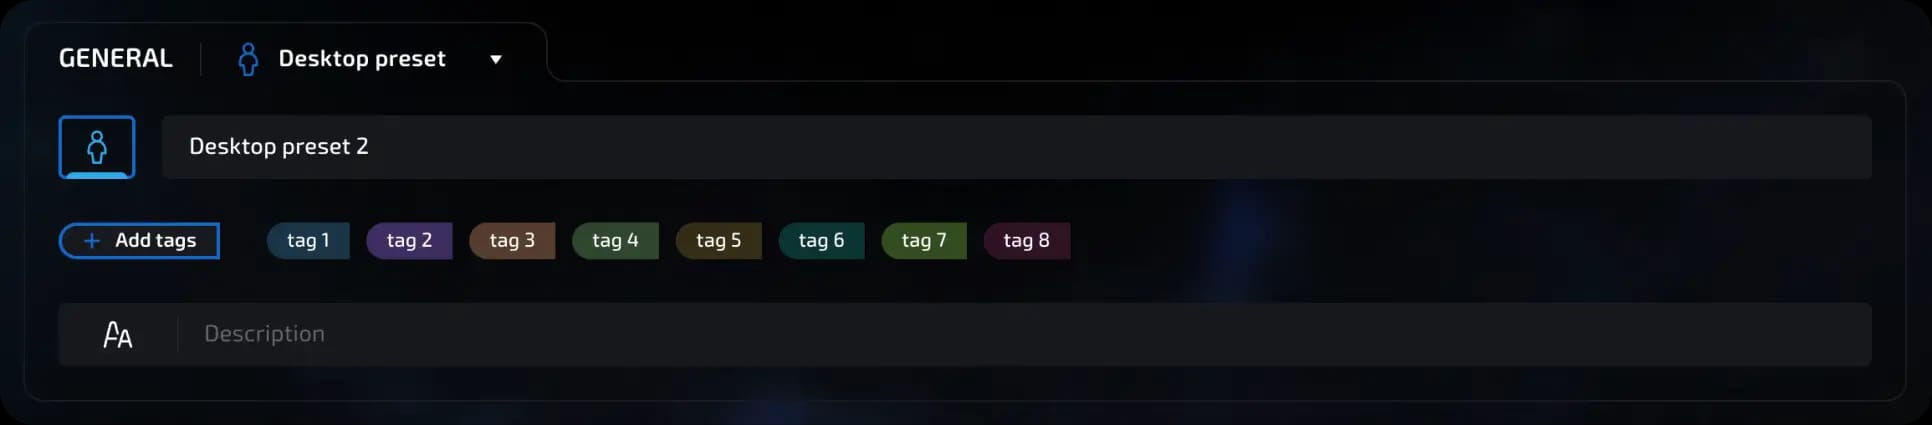
Block 1. General
This block defines the basic settings for session personalization.
Preset. By default, Desktop preset and Mobile preset are available. Selecting a preset automatically fills in the parameters in all other blocks. After applying the value, you can change it manually. In the same menu, you can create a new preset or delete an old one. A preset works as a preconfigured settings template.
Session name. Required field with a maximum length of 50 characters.
Icon. Selected from a fixed set of icons; you cannot upload your own.
Tags. For quick search and grouping of sessions. Limited to 20 characters per tag, names must be unique. You can select multiple tags or add new ones.
Description. Optional field for notes. Supports basic text formatting, including code highlighting and lists.
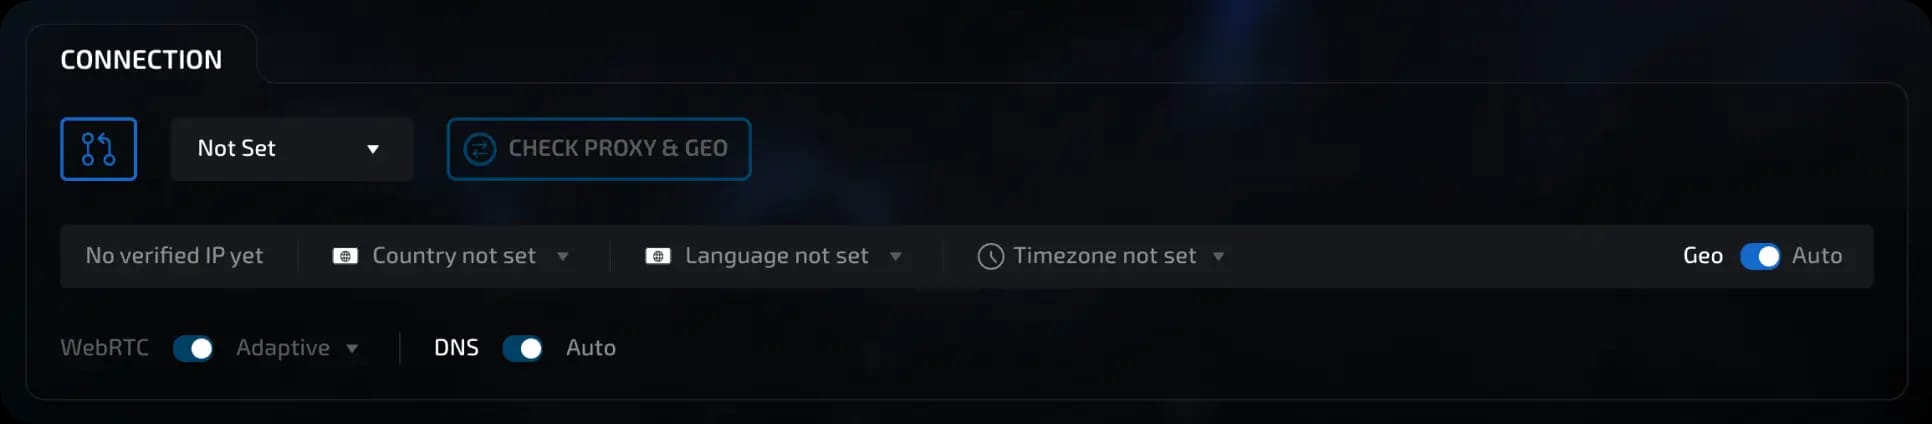
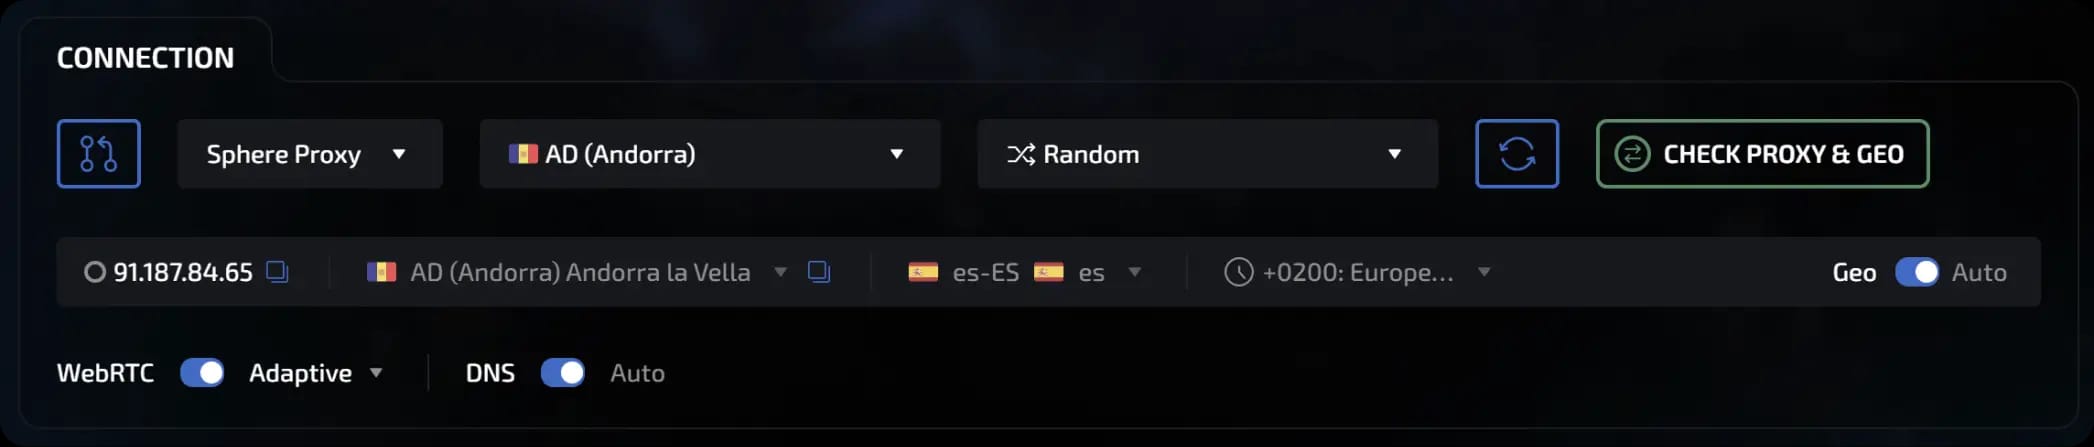
Block 2. Connection
Configure the network channel through which the session connects to the Internet. The selection affects anonymity, geolocation, and bandwidth.
Connection types
1. Not Set. No connection selected. The profile is saved but not launched.
2. Socks5. Connection via SOCKS5 proxy. Requires IP and port. Login and/or password are not required. List of supported proxy and ssh formats:
invisible text for space
Connection data, examples:
ip:port@login:pass
ip:port:login:pass
login:pass:ip:port
login:pass@ip:port
ip:port@login
ip:port:login
ip:port
invisible text for space
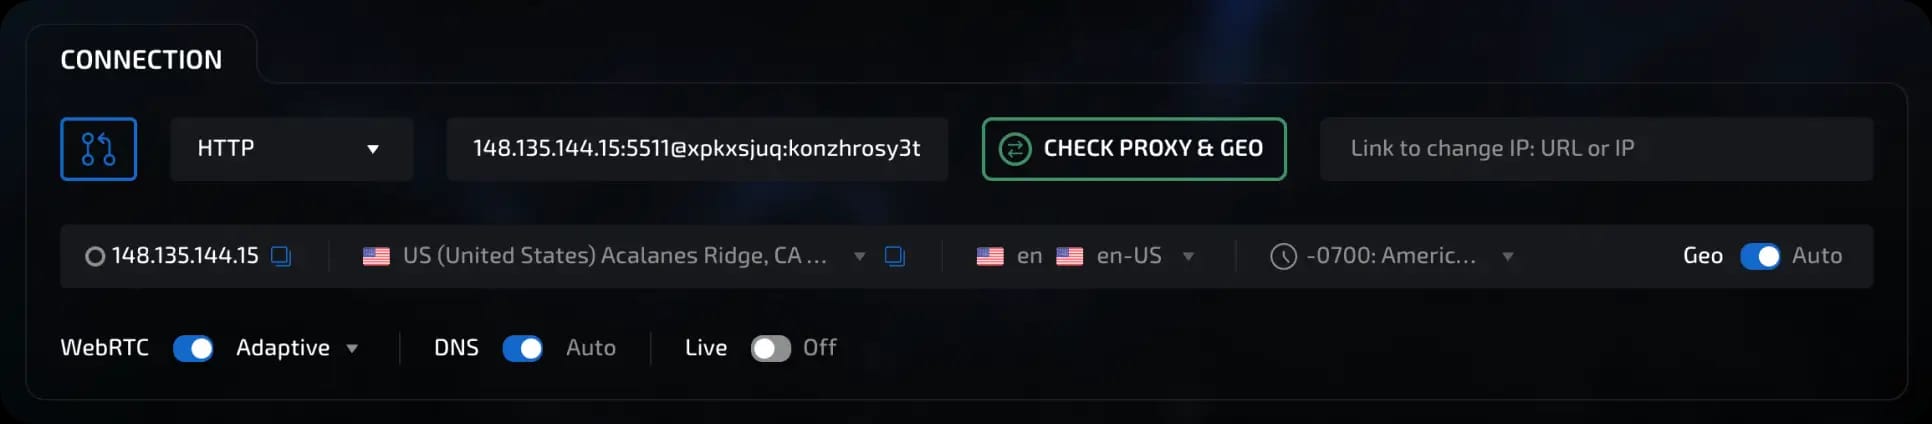
To work with dynamic proxies, there is: - the ability to specify a link to change the IP (allows you to change the IP with a button in the session manager) - Live mode (designed for dynamic proxies with timer rotation, ensures that webRTC, languages, geo, time zones, and other settings match the current IP when the IP is changed externally during a session)

3. HTTP. HTTP(S) proxy. Similar to Socks5; does not proxy WebRTC.
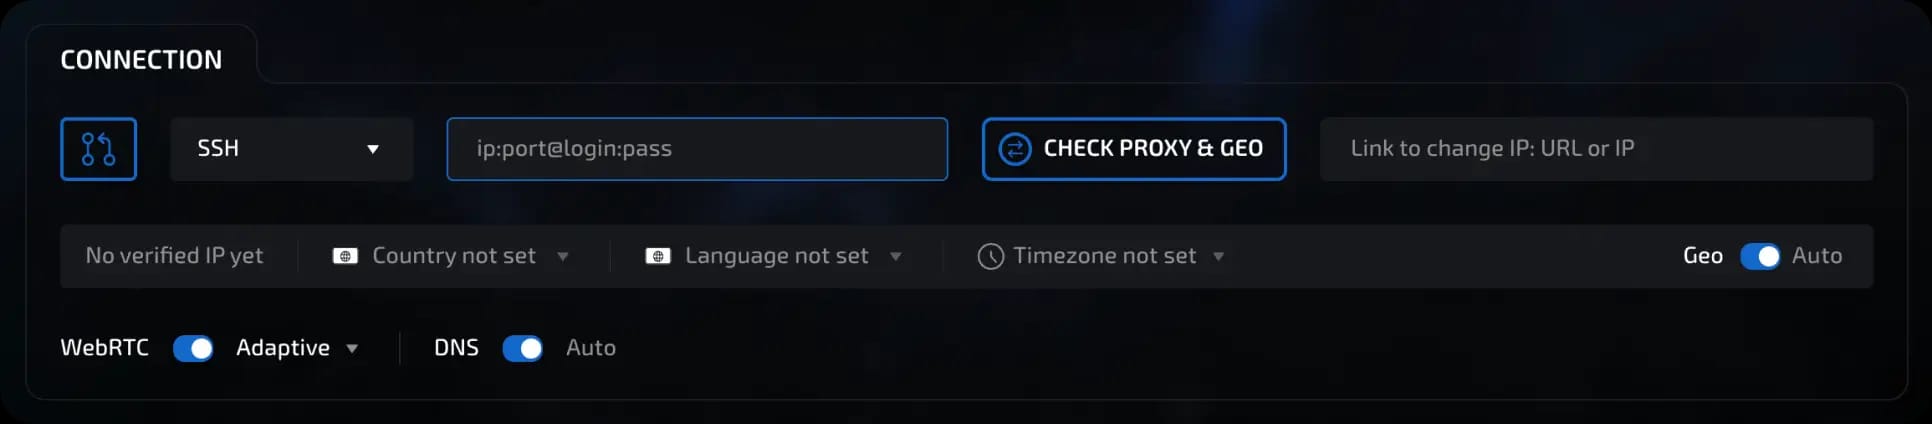
4. SSH. Requires IP, port, login, and password.
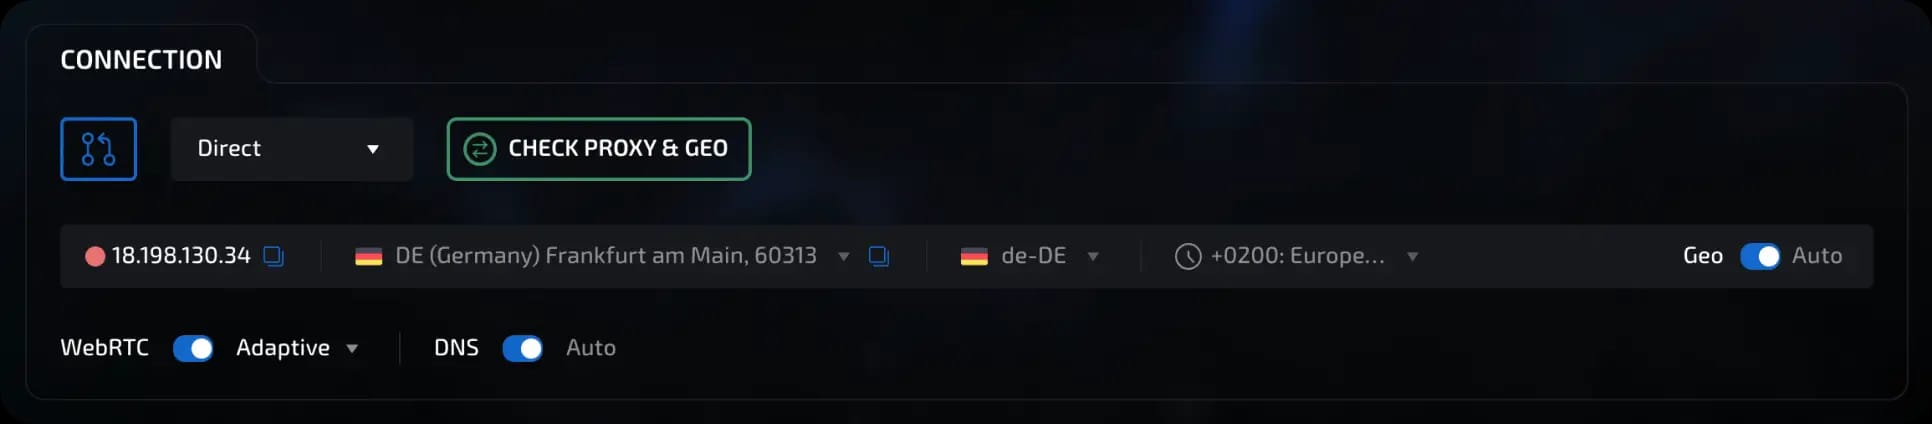
5. Direct. Direct connection without a proxy, uses the device's real IP.
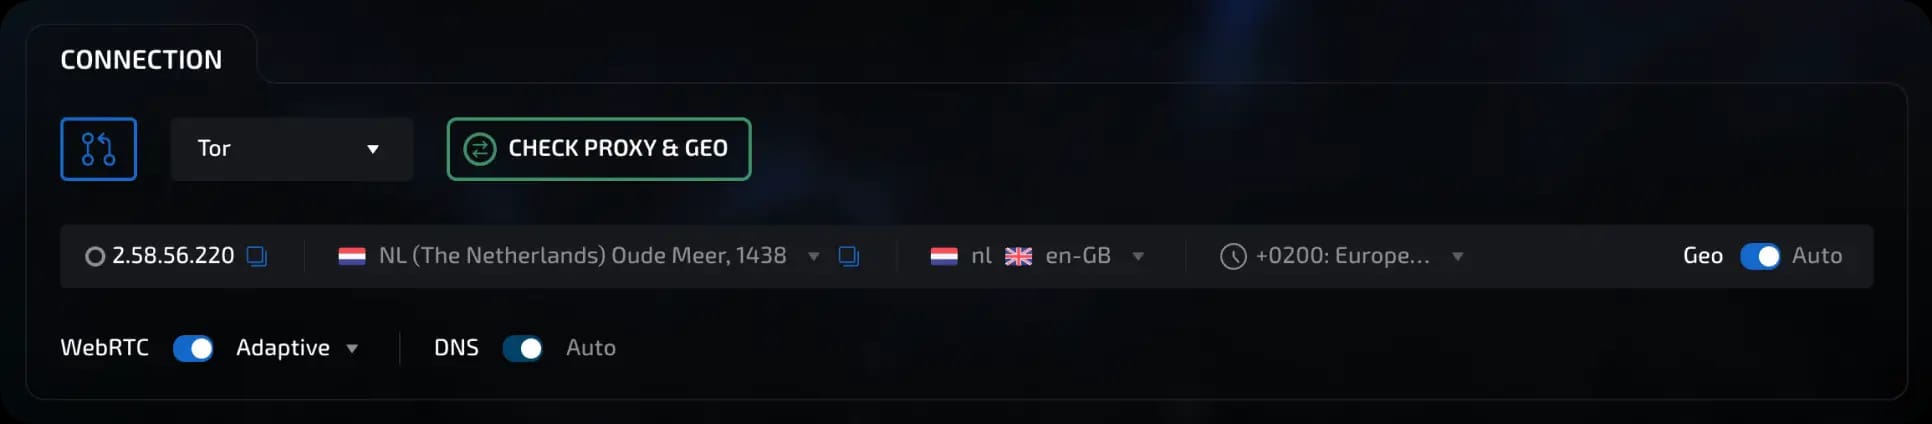
6. Tor. Uses the Tor network; parameters are set automatically. This connection type allows you to visit .onion sites.
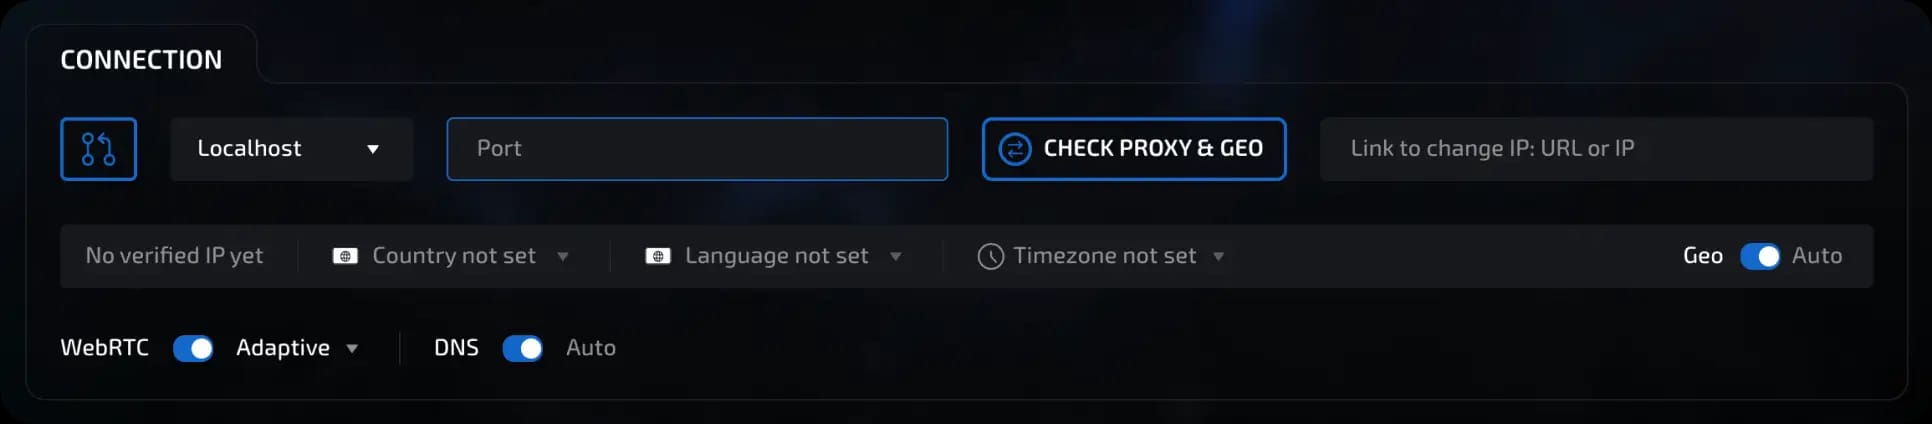
7. Localhost. This connection type is designed to work with local SOCKS5/HTTP proxies without authorization.
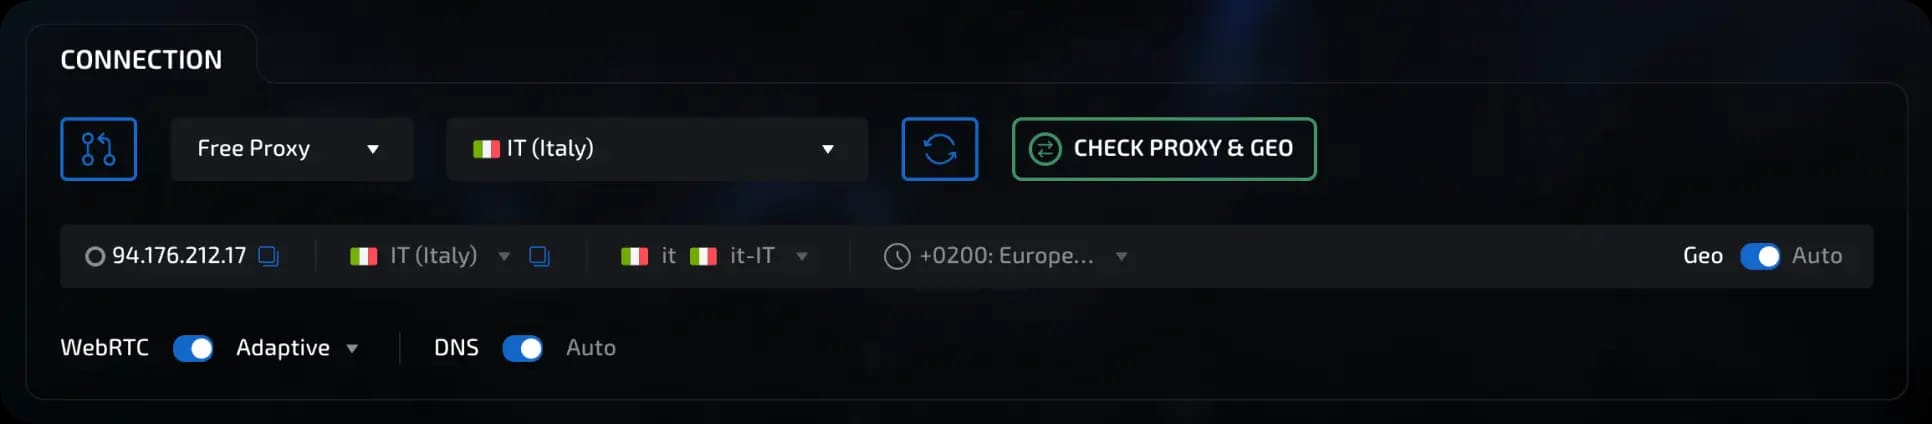
8. Free Proxy. Built-in pool of free proxies; configured automatically. Available for use starting with the Light plan. Not intended for work, only for testing and surfing sites from different geolocations.
9. Sphere Proxy. Resident dynamic proxies with the ability to select by geo (country, city/region) with pay-per-traffic. Available to users of any Sphere license, including Free.
Additional settings
The "Check proxy and geo" button tests the proxy's performance and determines a number of settings based on the IP address: geolocation, language, time zone. Sphere uses the MaxMind GeoIP database, which is also used in most modern anti-bot solutions.
The verified IP, country, language, and time zone are displayed after a successful check.

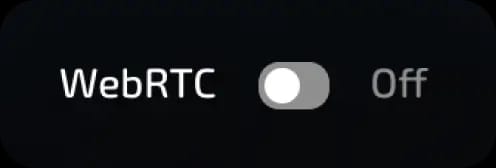
WebRTC settings
WebRTC (Web Real-Time Communications) is an open standard and set of APIs that allows web browsers to establish direct peer-to-peer (P2P) connections with each other for real-time data exchange. It is actively used in audio/video calls, online games, etc.
However, from the point of view of anti-bot systems, it is another way to identify a user. WebRTC can reveal your real IP address when using a proxy. Therefore, Linken Sphere provides several modes of operation for this component:
invisible text for space
Adaptive (automatically adjusts to the selected connection type and applies substitution only where it is really necessary; used by default; for more details, see New WebRTC substitution mode in Linken Sphere | Linken Sphere)

Fake (WebRTC enabled, leaks are replaced with the proxy IP address, protocol functionality is limited)

Direct (WebRTC enabled, returns the real IP address without applying replacements, the protocol functions fully)

N/A (WebRTC enabled, leak returns N/A instead of IP address, protocol functionality is limited)

Off (WebRTC disabled)
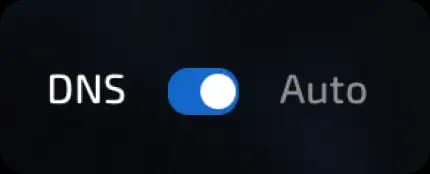
DNS settings
DNS (Domain Name System) is a distributed system that works like an internet address book.
When you enter a website address in your browser, your computer does not know where the server for that website is located. It sends a request to a DNS server, which "translates" the human-readable name of the website into a machine-readable IP address, such as 35.224.127.10.
In the context of anti-bot systems, the DNS servers used by a user to resolve domains can indicate their geographic location. For example, it allows you to determine your country even when working through a proxy.
invisible text for space
Linken Sphere has the ability to manage DNS, the available options are:
Auto: Uses DNS from a proxy (if available) or one of the popular providers.
Custom DNS: specified manually.

The Geo/Auto switch allows you to manage localization settings - languages, geolocation, time zone. In the Auto position, the settings are automatically determined based on the outgoing IP address of the current connection. In the Geo position, you can specify all these settings manually.

IMPORTANT!!! We do not recommend making changes to the DNS settings unnecessarily. In most cases, the Auto position is sufficient.
Features
If Not Set is selected, startup is not possible.
For Socks5, HTTP, SSH, and Localhost, IP and port are required.
Sphere Proxy and Free Proxy do not require manual input of parameters.
Block 3. Data
This block allows you to manage the data stores used in the session.
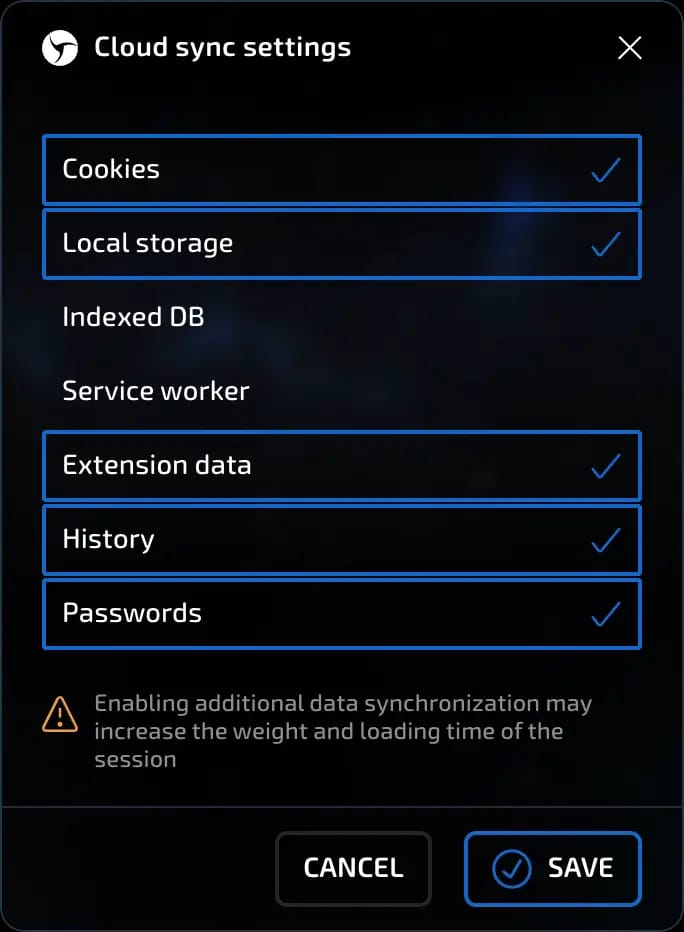
Cloud synchronization
Cloud synchronization allows you to save and restore the state of sessions between devices or within a team. You can manually select which types of data will be synchronized.
To do this, click on the triangle to the right of the Cloud Synchronization label and a settings window will appear.
invisible text for space
What data can be enabled or disabled in this window:
Cookies - authorization and activity files on websites.
Local Storage - allows websites to store data directly in the browser without time restrictions. May contain the contents of incomplete forms, cached data that does not require constant downloading from the server. In rare cases, it is used to identify sessions.
IndexedDB - a database in the browser. Used, for example, by Telegram to store authorization data or by web games for caching.
Service Workers - background processes and cache critical for some web applications.
Extension data - extensions installed in the session and their internal data.
History - a list of visited websites.
Passwords - logins and passwords linked to domains.
How it works:
Each session has a unique ID that is used to track data.
When a session is launched, the system compares where the data is newer - on the device or in the cloud.
The most recent data is used.
If the browser crashes or the device is turned off, you can restore the session from the cloud (when using the PRO plan and above).
invisible text for space
Data recovery:
Up to 10 backups per session are available.
Cookies, passwords, extensions, local storage, IndexedDB, and more are restored.
Recommended settings for beginners:
Enabled by default:
Cookies
Local Storage
History
Passwords
Extensions
invisible text for space
Disabled by default:
IndexedDB
Service Workers
Data that is disabled by default can significantly increase session size and load time. Enable them only when necessary.
Cookies
Cookie import
Linken Sphere supports cookie import in several formats:
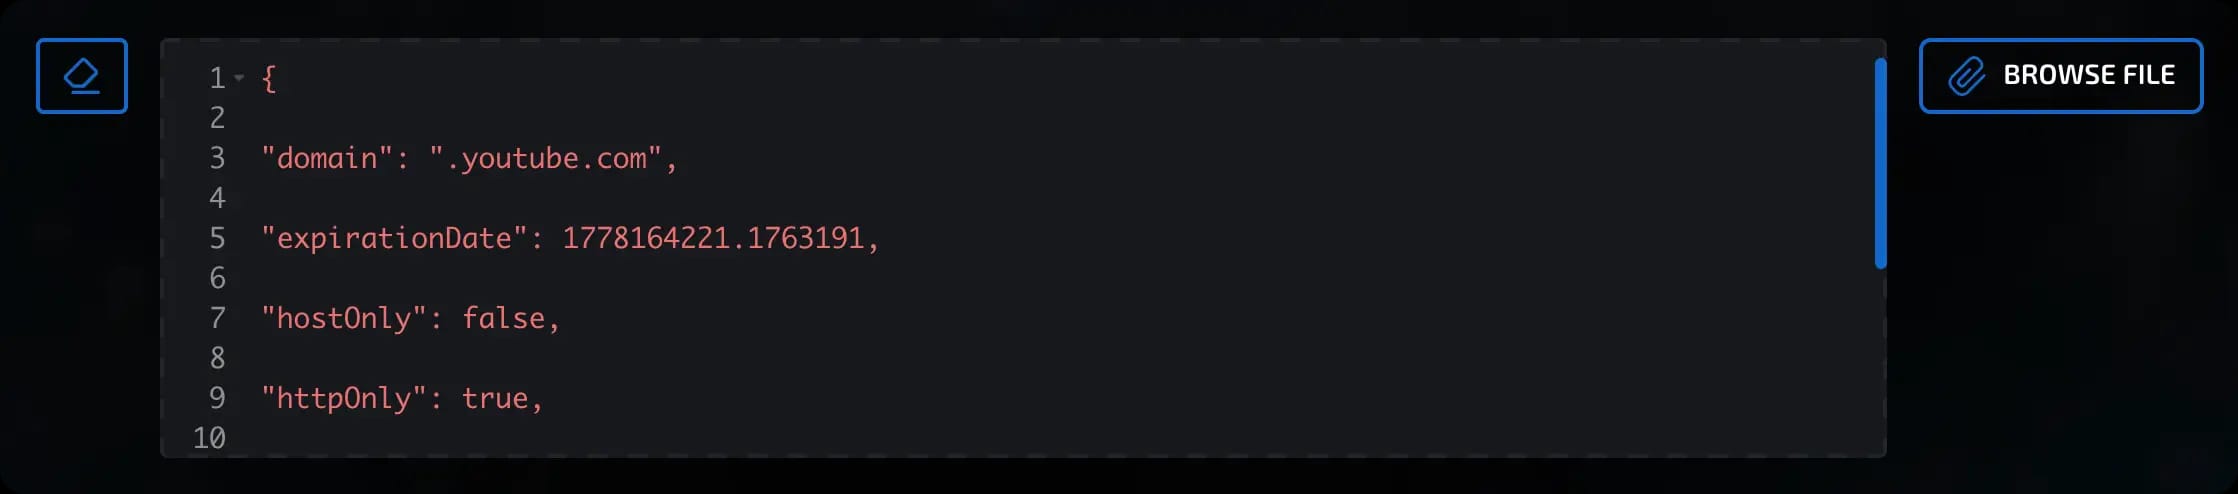
JSON:
[{
 "domain": ".youtube.com",
 "expirationDate": 1778164221.1763191,
 "hostOnly": false,
 "httpOnly": true,
 "name": "__Secure-YEC",
 "path": "/",
 "priority": "medium",
 "sameSite": "lax",
 "secure": true,
 "session": false,
 "sourcePort": 443,
 "sourceScheme": "secure",
 "storeId": "0",
 "value": "CgsyZlNpMVJNOEJrMCiAw8-_BjInCgJOTBIhEh0SGwsMDg8QERITFBUWFxgZGhscHR4fICEiIyQlJiBU"
}]
Netscape: .youtube.com TRUE / TRUE 1778164221 __Secure-YEC CgsyZlNpMVJNOEJrMCiAw8-
Both options are supported.
invisible text for space
How to upload cookies:
Using the file selection button ("Select File");
By dragging the file into the program window (Drag'n'Drop);
By pasting the text directly - if it is a valid cookie, the program will recognize it.
After clicking the Create button, a session is created with the cookies you imported.
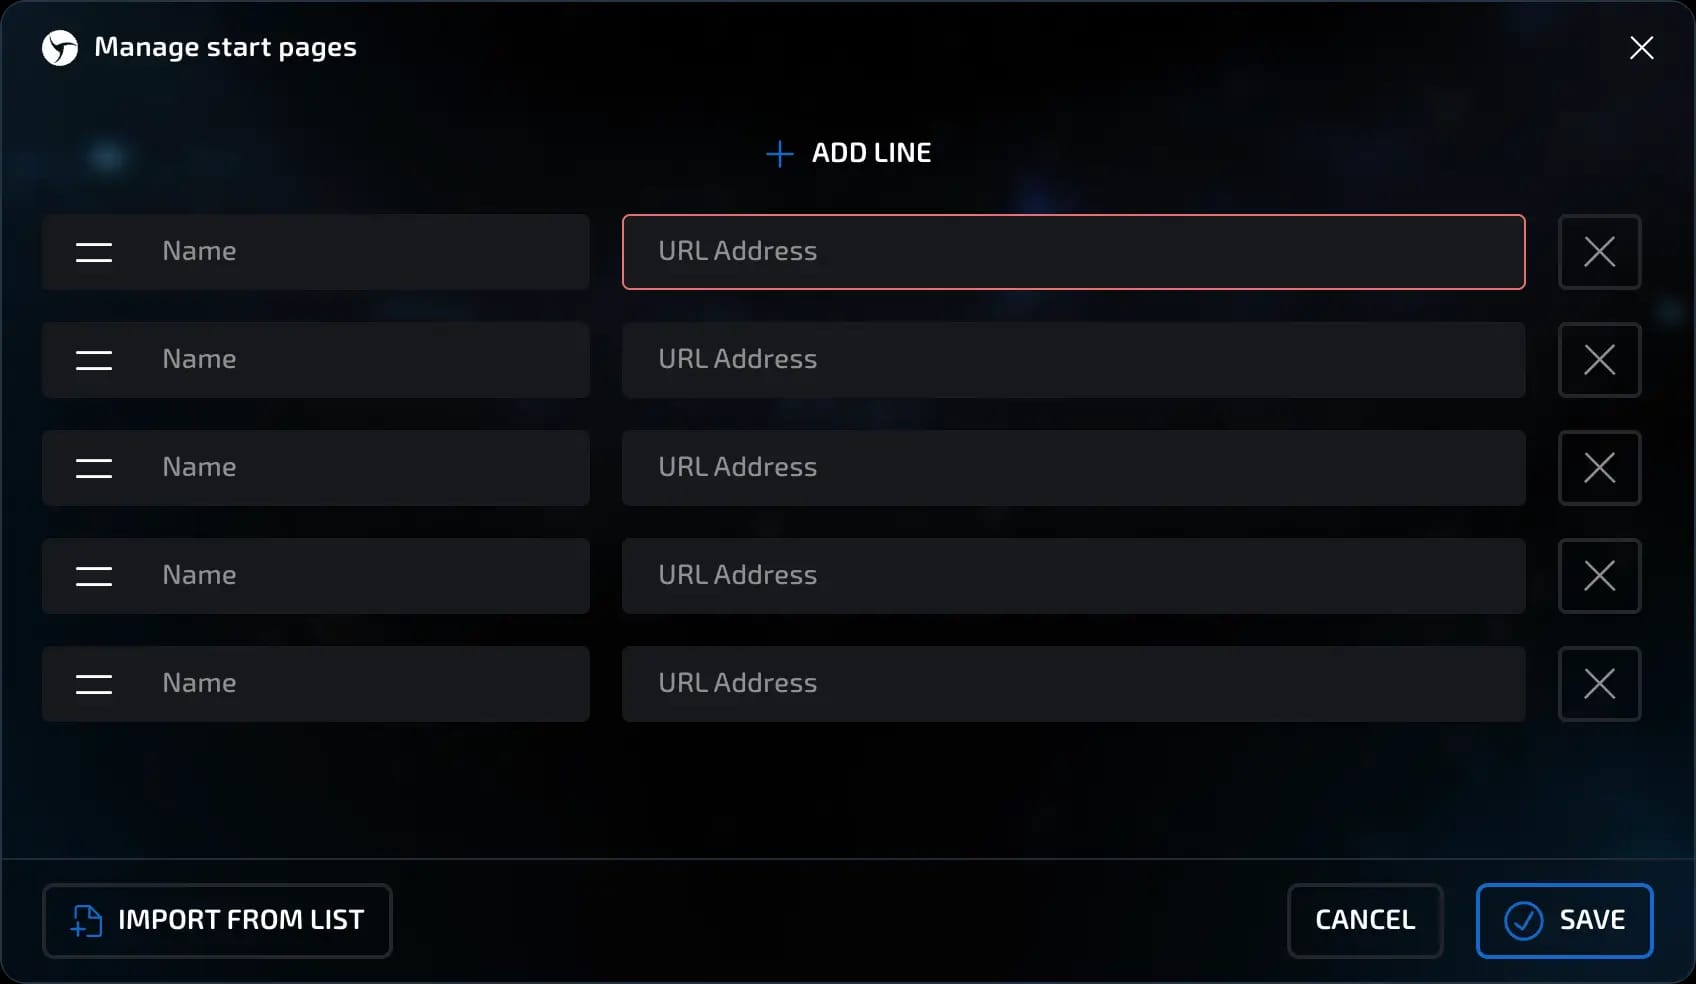
Start pages
You can specify which pages will open when the session starts.
invisible text for space
How to set start pages:
When creating a session, add the desired URLs (for example, fb.com, mail.google.com).
The pages will automatically appear as tabs when you first start the session.
invisible text for space
Behavior when starting a session:
When you first start, all specified start pages will open.
If all tabs were closed during operation, the start pages will open again the next time you start.
If there are open tabs before closing, they will be restored the next time the session is launched.
invisible text for space
Thus:
If there are no open tabs, the start pages are launched;
If there are open tabs, they are restored.
This helps you always start working at a familiar point.
Bookmarks
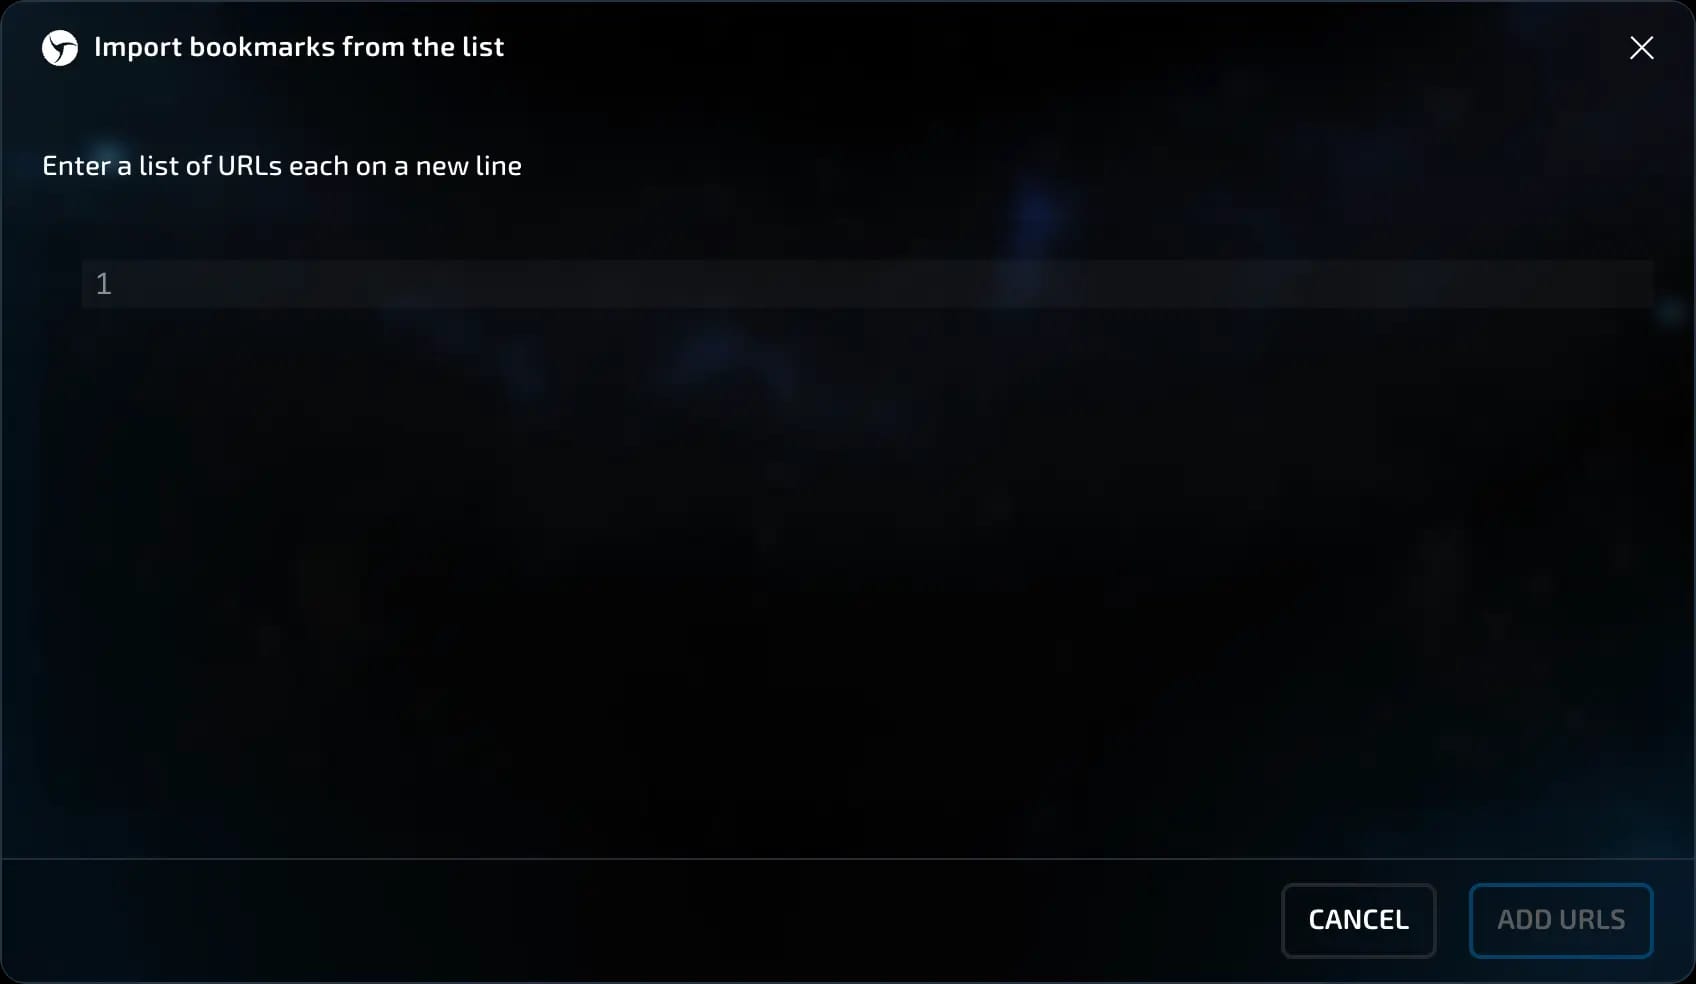
Linken Sphere supports importing bookmarks in two ways:
Netscape bookmark file format (a universal format supported by all popular browsers).
List of links (one link per line, can be pasted from the clipboard)
invisible text for space
Exporting bookmarks
In any of the popular browsers, you can:
Open Bookmark Manager.
Find the "Export Bookmarks" function - it usually saves the file in HTML format.
The resulting file can be used to import into a session.
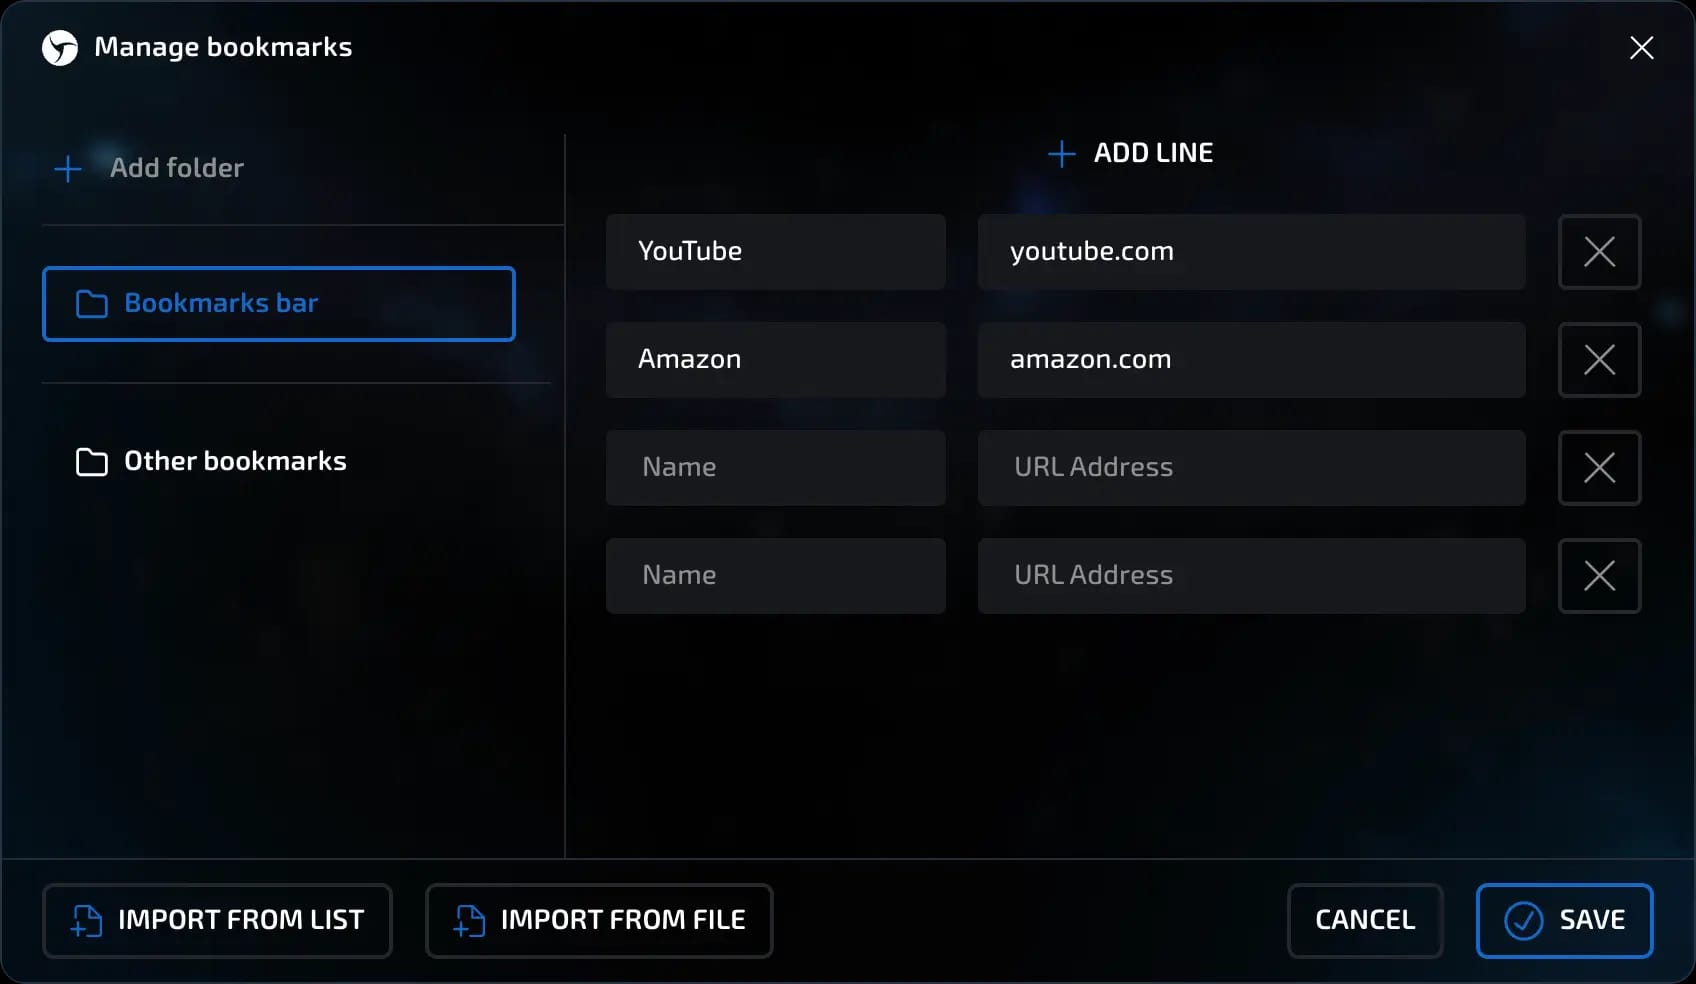
Importing into a session
Currently, all bookmarks (regardless of the source file, whether it is a list of links or HTML with bookmarks divided into folders) are imported into the current folder selected in the interface at the time of importing the file. The structure of the HTML file will be ignored, but the names and links of the bookmarks will be transferred correctly.
invisible text for space
Alternative method - manually
You can manually:
Create folders
Add bookmarks (name + URL)
Arrange them in the desired order
Editing bookmarks
After stopping the session, you can:
Go to bookmark management
View and, if necessary, edit bookmarks without starting the session itself
This is convenient if you need to check or adjust the list of bookmarks in advance.
invisible text for space
Conclusion
The bookmark system is flexible and fully compatible with Chrome. This simplifies the configuration of work sessions, especially if you often use the same sets of bookmarks for different profiles.
Extensions
Popular extensions
The left side of the interface displays a block of popular extensions.
In addition to popular extensions, the block on the left will also display custom extensions installed by the user.
When you click the install button next to an extension, it is downloaded directly from the Chrome Web Store and installed in the session.
invisible text for space
Installation and pinning
When you start a session, the selected extensions are automatically installed.
Those for which the pin was activated in the extension management section of the session settings are pinned to the browser panel.
The rest can be pinned manually through the browser interface.
invisible text for space
Synchronization and saving
After stopping the session (Stop button), all installed and pinned extensions are synchronized.
The information is saved either in the cloud or in a local file, depending on the selected data storage location specified in the session settings.
invisible text for space
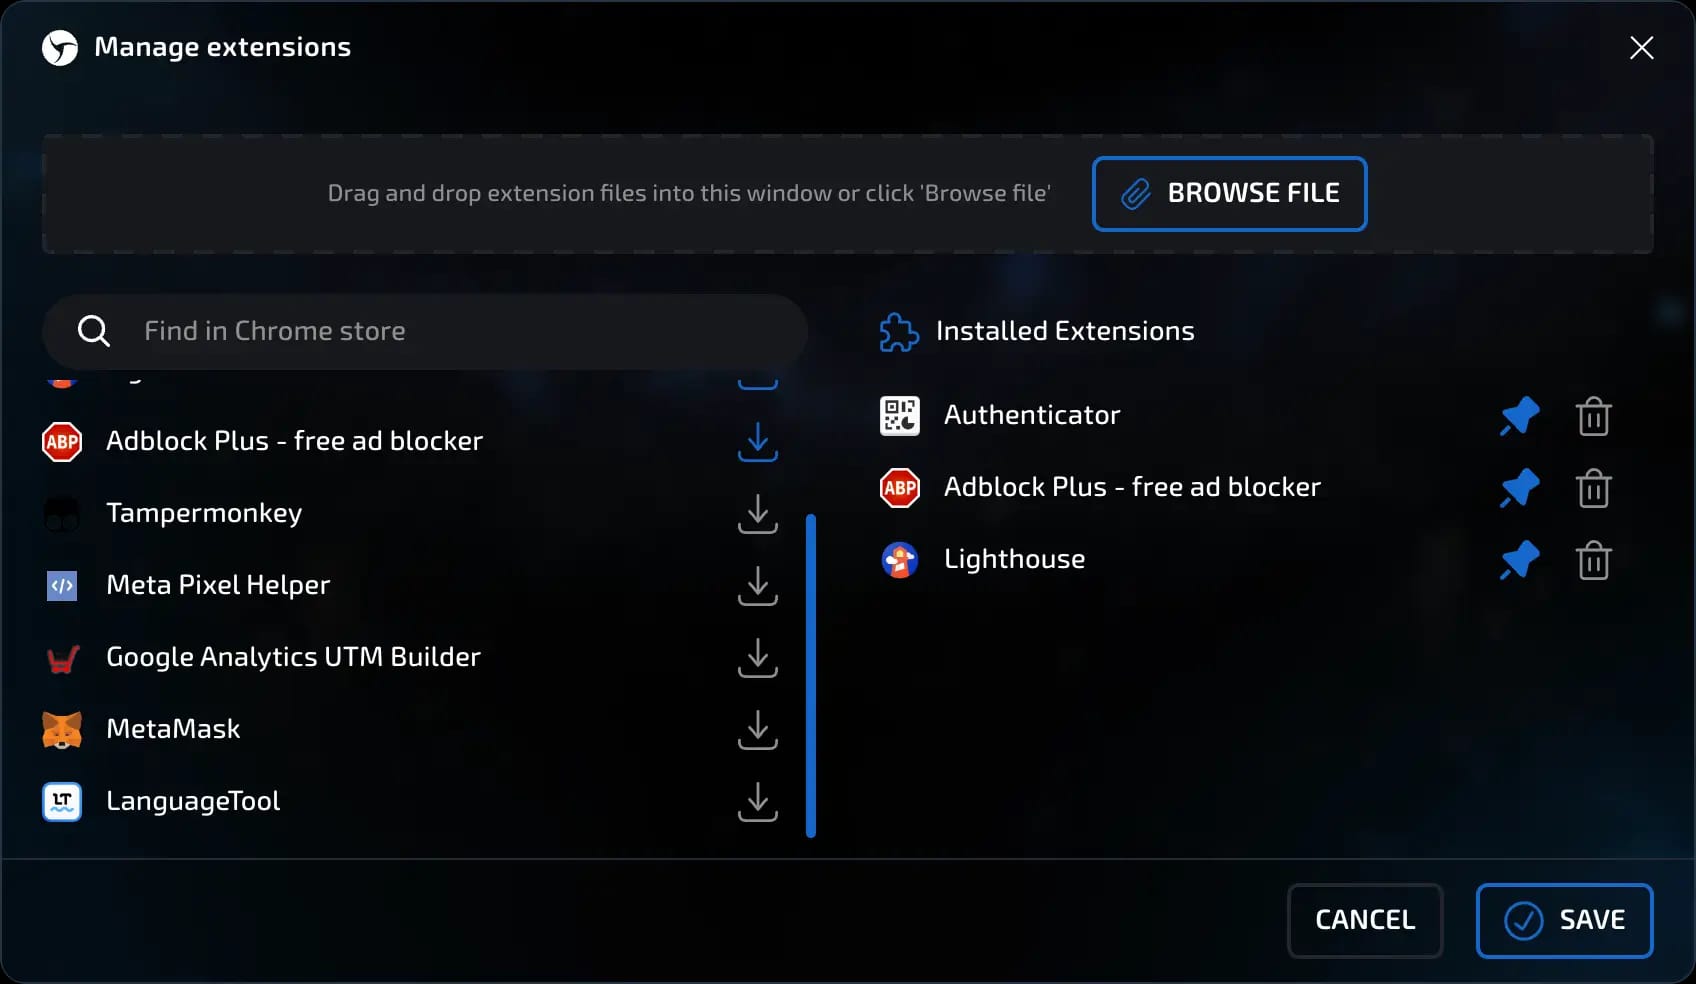
Extension management
In the Extension Management section, you can:
View a list of current session extensions;
Delete individual or all extensions and install new ones from the Chrome Web Store;
Add custom/user extensions manually, for example:
By dragging and dropping the file (Drag-n-drop);
By selecting the file via the dialog box.
IMPORTANT!!! Linken Sphere supports self-written custom extensions in crx and zip formats.
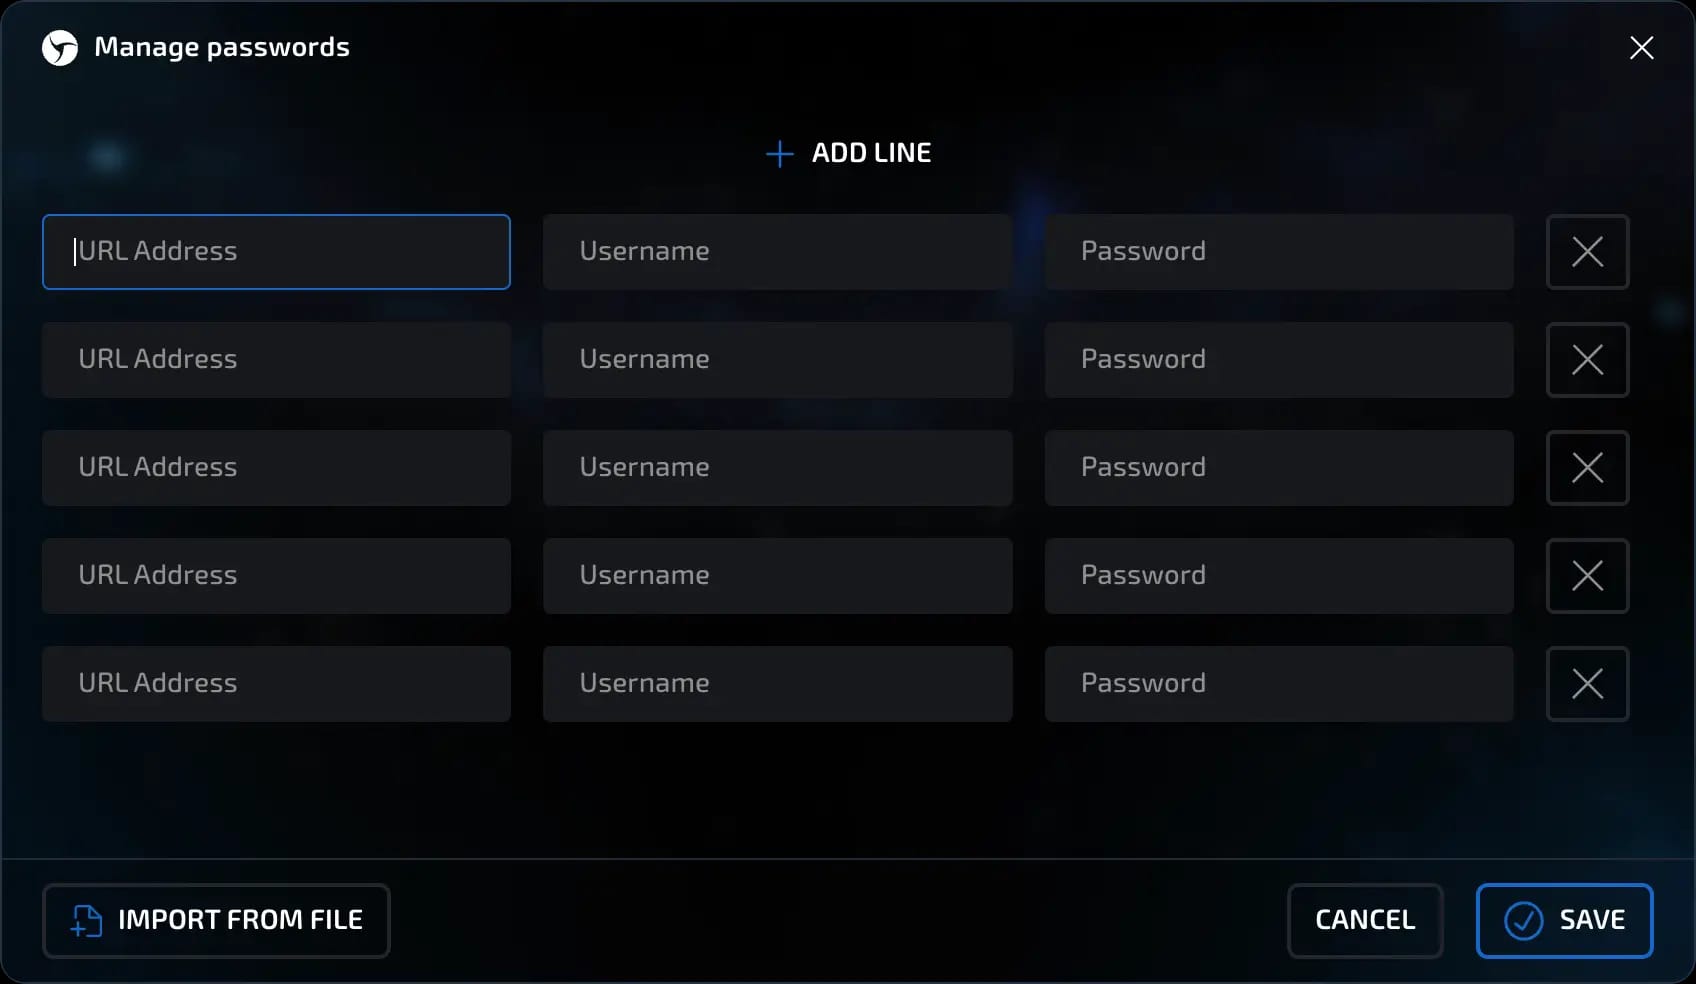
Passwords
Linken Sphere includes a built-in password manager.
invisible text for space
Features:
Storage of logins and passwords by domain.
Import via CSV file.
View, edit, and delete entries manually.
invisible text for space
Tips:
After importing, check that all data is correct.
It is not recommended to store important passwords without encryption outside the manager.
Block 4. Fingerprints
Configuration of parameters that form the browser's digital fingerprint.
Anti-detection modes
In Linken Sphere, you can choose one of three types of anti-detection modes. Each is suitable for different tasks and user skill levels.
invisible text for space
1. Hybrid 2.0 (recommended option)
Unique Linken Sphere technology. The configuration is formed automatically, without the need to manually adjust the parameters.
Optimal for most tasks.
Bypasses even complex anti-bot systems.
Works especially well on devices with Apple M-series processors (Mac), but is also stable on Windows.
This mode uses a combined approach to fingerprinting (part is taken from real fingerprints, and part is replaced). As a result, you get a fairly unique session without the use of noise that could negatively affect the success of your work.
It is recommended to use hybrid mode first.

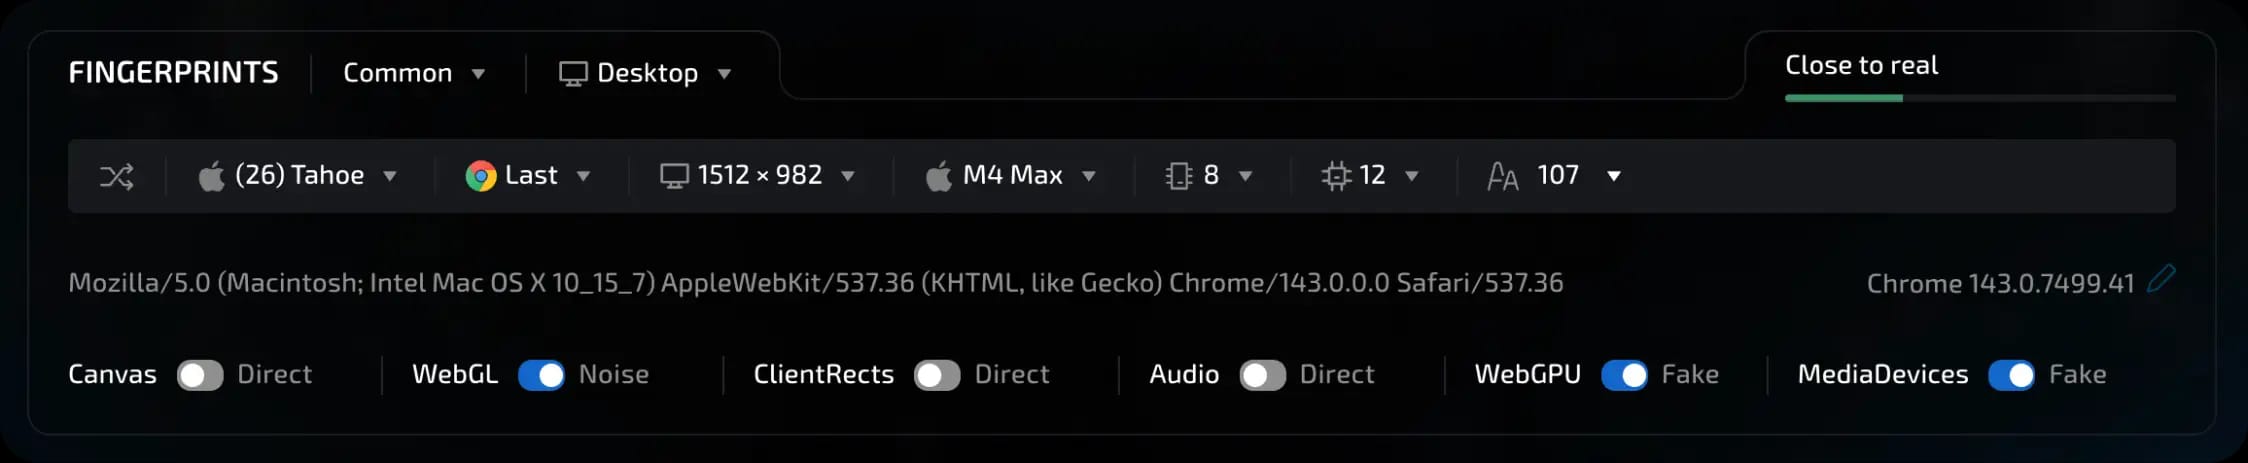
2. Normal mode
Allows you to manually set session parameters:
Operating system and its version
Browser version
Screen resolution
Number of cores
Video card / video core type and other characteristics
Suitable for experienced users who need flexible and precise configuration.
invisible text for space
Recommendations for replacements in normal mode:
Enable replacement: WebGL, ClientRects, WebGPU, MediaDevices
Canvas: it is better not to enable noise right away. This is the most noticeable way for anti-bot systems to make fingerprints unique. Use it only when necessary.
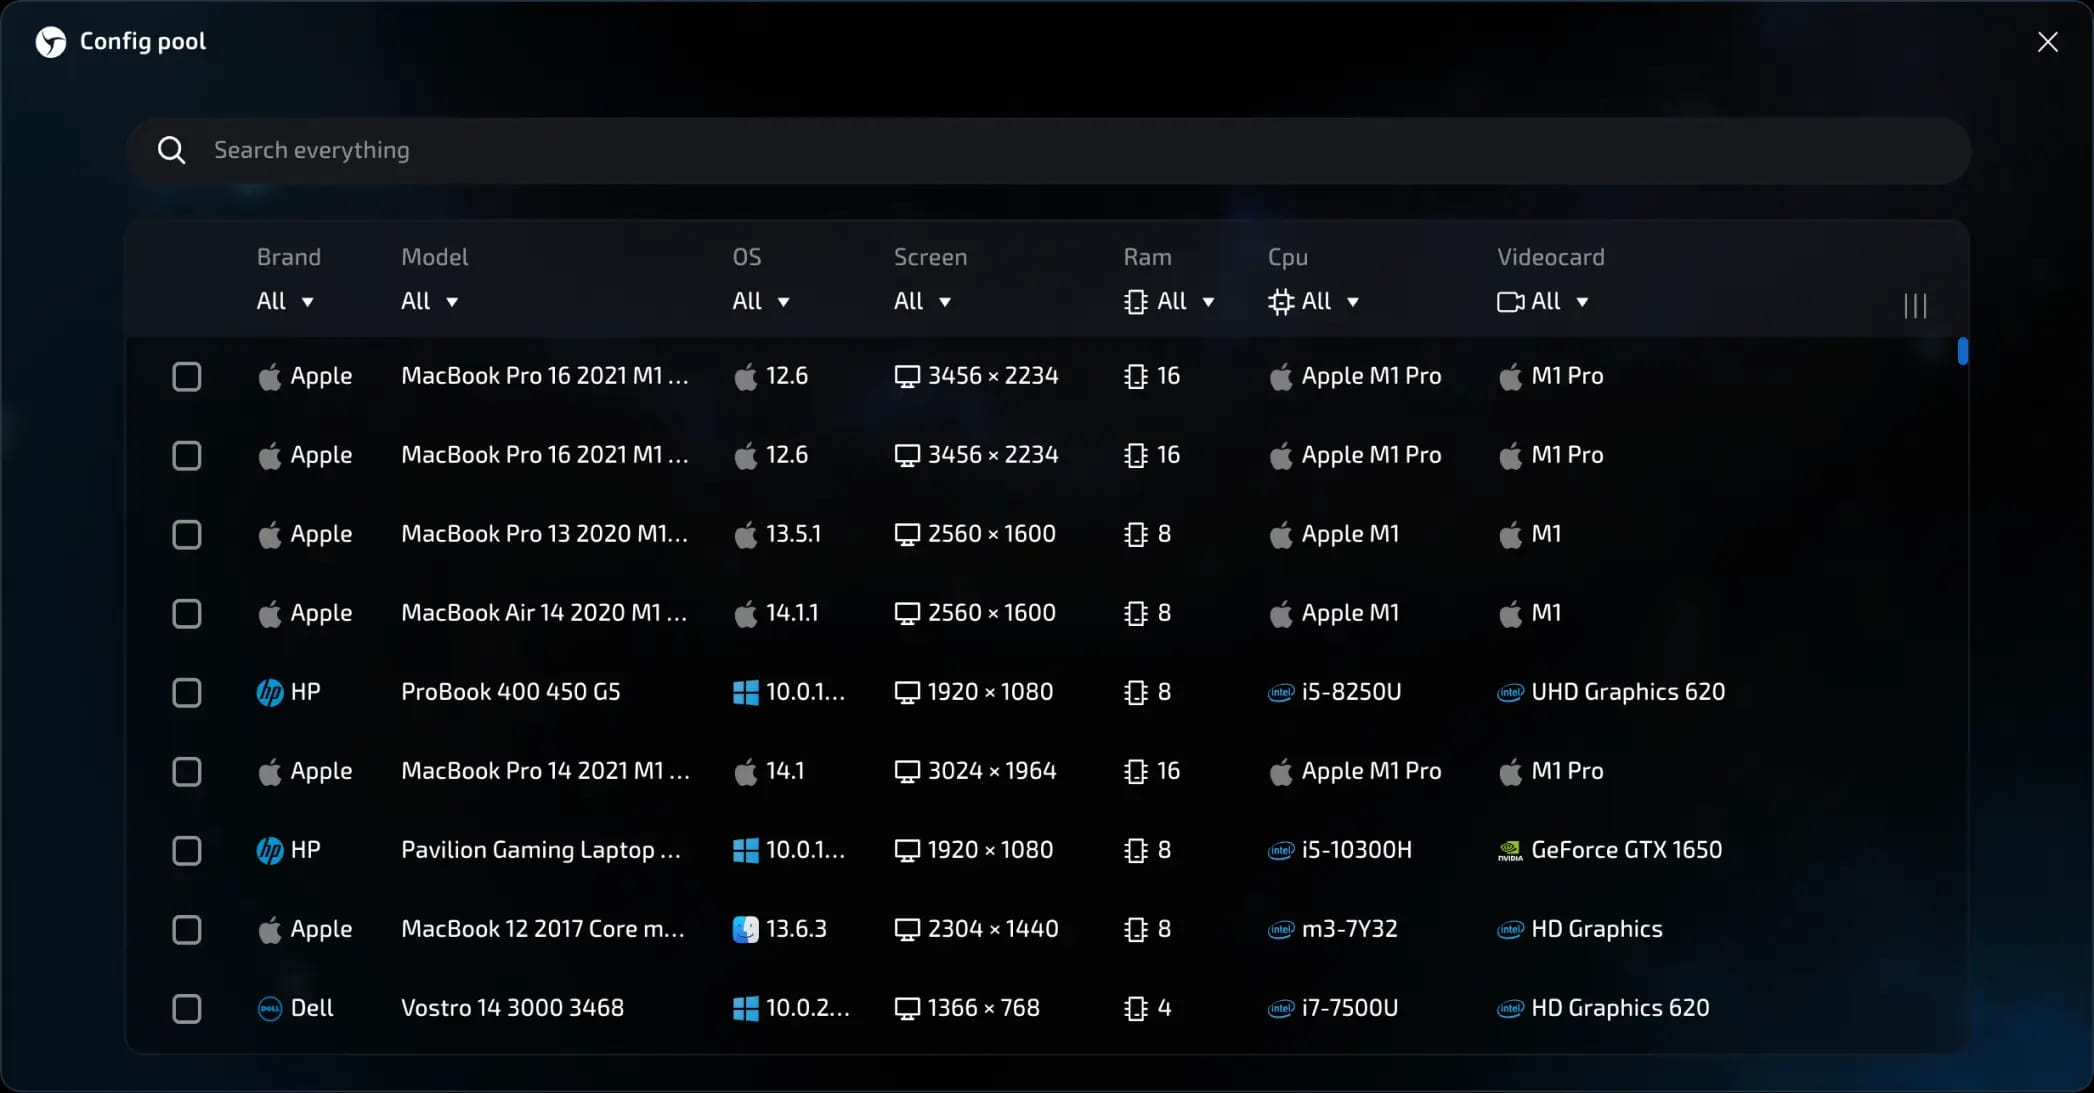
Configuration pool
You can select a pre-generated fingerprint from the list of configurations from real devices.
This is convenient if you want to get started quickly without manual configuration.
The same recommendations for substitutions apply as in normal mode.
When to change modes?
If you start to encounter suspicions or blocks when you have a large number of sessions with the same site, try the following:
Switch from hybrid to normal mode
Or use the configuration pool
invisible text for space
Conclusion
Hybrid - suitable for most tasks and is ideal for getting started.
Normal mode - provides more flexibility when configuring settings and full control over the substitutions used.
Configuration pool - ideal if you need complete compliance with the parameters of a specific, real device.
Key parameters
The ability to select the configuration type (Desktop/Mobile/Tablet) is only available when using normal (common) mode.
If we break down the browsers available for emulation, then: Chrome - available in all cases (Win, Mac, iOS, Android). Edge, Opera, Brave - available only in combination with Windows. Safari - available only for macOS and iOS (iPhone/iPad).
List of emulated operating systems: Windows, MacOS (intel), MacOS (ARM; also known as M-series or Apple Silicon), Android (phone/tablet), iPhoneOS (phone), iPadOS (tablet).
Hardware specifications: screen resolution, GPU, number of CPU cores, RAM capacity, list of fonts used in the system.
User‑Agent is generated automatically
Canvas, WebGL, ClientRects, Audio, WebGPU, and MediaDevices substitution.
The configuration uniqueness indicator on the right shows the rating of your selected settings. There is no ideal value here; it all depends on your task. There are three main rating grades: 1. Green (closer to real) 2. Yellow (average uniqueness) 3. Red (too high uniqueness or configuration error). Each result is accompanied by a text status that allows you to better understand the rating.
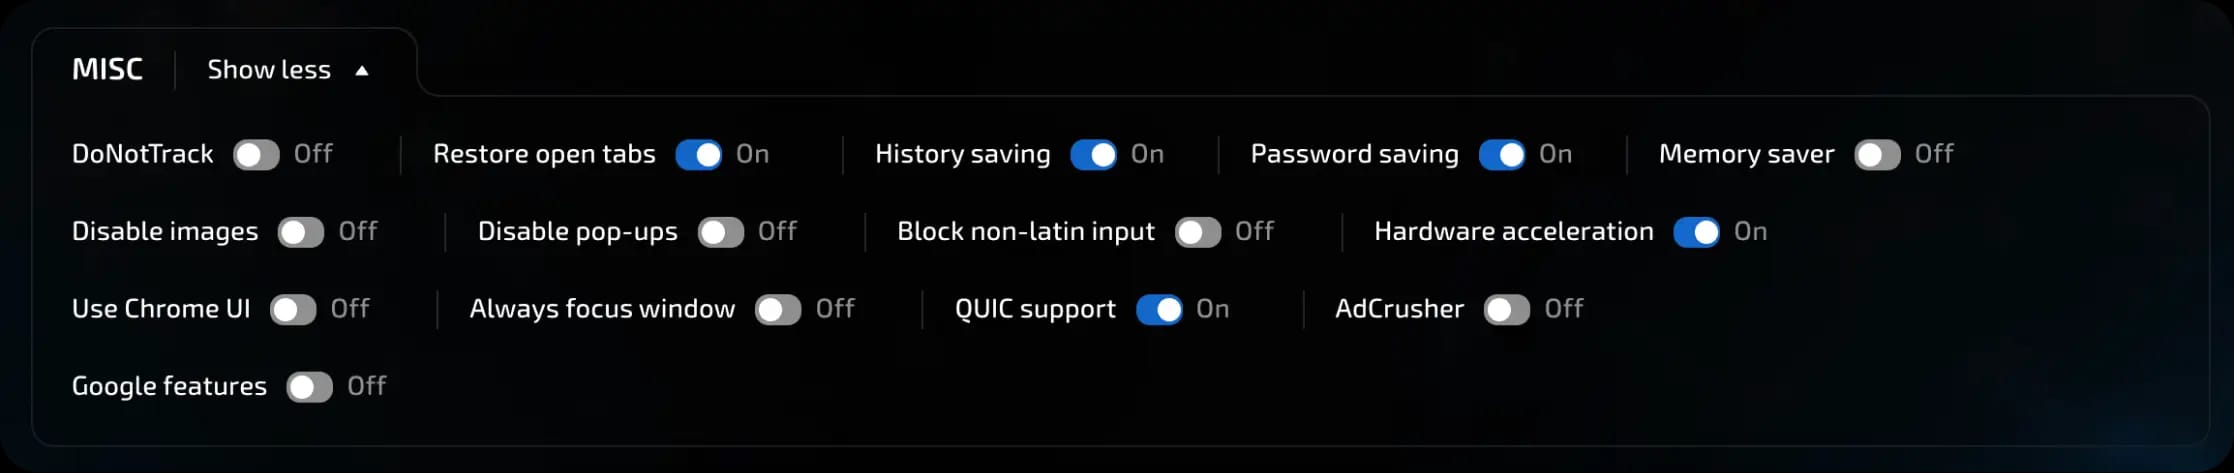
Block 5. Miscellaneous
“Fine-tuning” browser behavior.
Available settings
Do Not Track. Send a "Do Not Track" request.
Restore tabs. Open previous tabs when restarting.
Save history. Keep a log of visits.
Save passwords. Allow the browser to save login details.
Memory saving. Disable background processes to reduce load.
Disable images. Block image loading to speed up loading and save traffic.
Block pop-ups. Block pop-up windows.
Block non-Latin input. Prevent the input of non-Latin characters.
Hardware acceleration. Use the GPU for rendering.
Chrome interface. Show the standard Chrome browser interface.
Always focus the window. Constant emulation of the focus state for the session window. This is useful if the target resource changes its behavior depending on the user's focus status (for example, stops displaying ads or notifications).
QUIC support. QUIC is a transport protocol based on UDP. Recently, anti-bot systems have been paying more and more attention to its support. Enabled by default.
Management
Reset. Restore all default values.
Create. Save the session without launching it.
Create and launch. Save and open the profile immediately.

Quick session creation
The quick session creation feature is designed to launch sessions as quickly as possible and is used directly from the main page of the interface.
Activated via the "Quick" switcher.
Once enabled, pressing the "New Session" button automatically creates a session without going to the settings editor.
invisible text for space
The selected preset is used for creation:
The preset can be set in advance or selected from the list.
All parameters (proxy, fingerprints, behavior, etc.) are automatically substituted from the template.

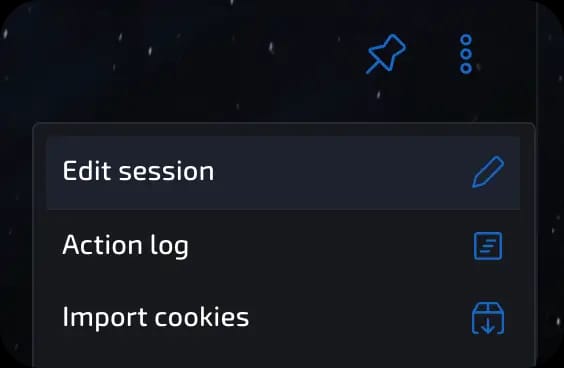
Once you have created a session on your desktop, you can customize it for your tasks. To do this, click on the three dots in the right corner of the session card or on the session icon.
Previous page